This tutorial shows how to print any file to multiple printers in one go with a simple-to-use piece of software called Spool Queue Viewer++ by Traction Software, if you want a second copy or print twice or more on printer different trays then this tutorial is the perfect choice for this purpose, simple and easy to follow guide and video.
See the instructions below for a simple step-by-step process that anyone can follow, in this guide, we use Spool Queue Viewer++ to show you how to setup print redirection to multiple printers.
Table of Contents:
- How to Print to Multiple Printers with Print Redirection
- Bonus: How to Convert Any Print Job back to PDF
Watch all the steps shown here in real time!
Explore more printing-related software tutorials on our YouTube channel.
The images below are from Spool Queue Viewer++ 2022 on Windows 10. These steps also apply to All versions of Spool Queue Viewer++ 2022 upwards on Windows 7 or greater.
How to Print to Multiple Printers with Print Redirection
To start with this tutorial presumes you have some files ready to print on your PC computer in a folder you have access to, you also need to have your printer installed as normal and accessible and you need to have the software Spool Queue Viewer++ trial or full version installed which can be found on traction-software.co.uk website here direct download link here
Please see the example video provided.
Step-By-Step Guide
- Connect your computer to the printer and ensure the printer(s) are turned on.
- Go into Windows Start Menu and search for Printers
- Click Devices and Printers this will open up a new window called: Control Panel\All Control Panel Items\Devices and Printers
- Click Add a Printer in the main toolbar. (see figure 1).
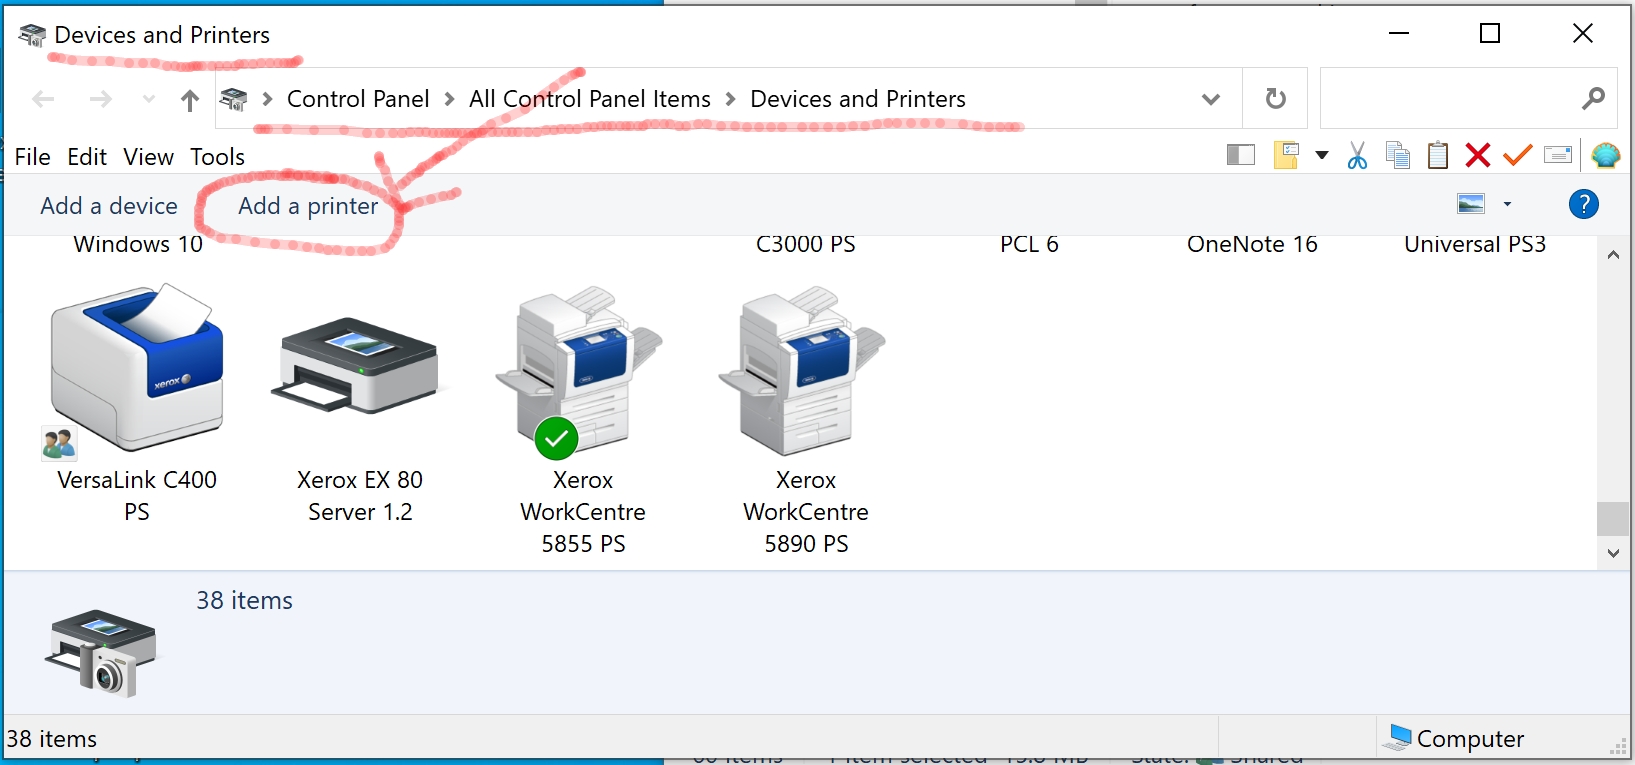
Figure 1. Add a Printer - Select The printer that I want isn’t listed. (see figure 2).
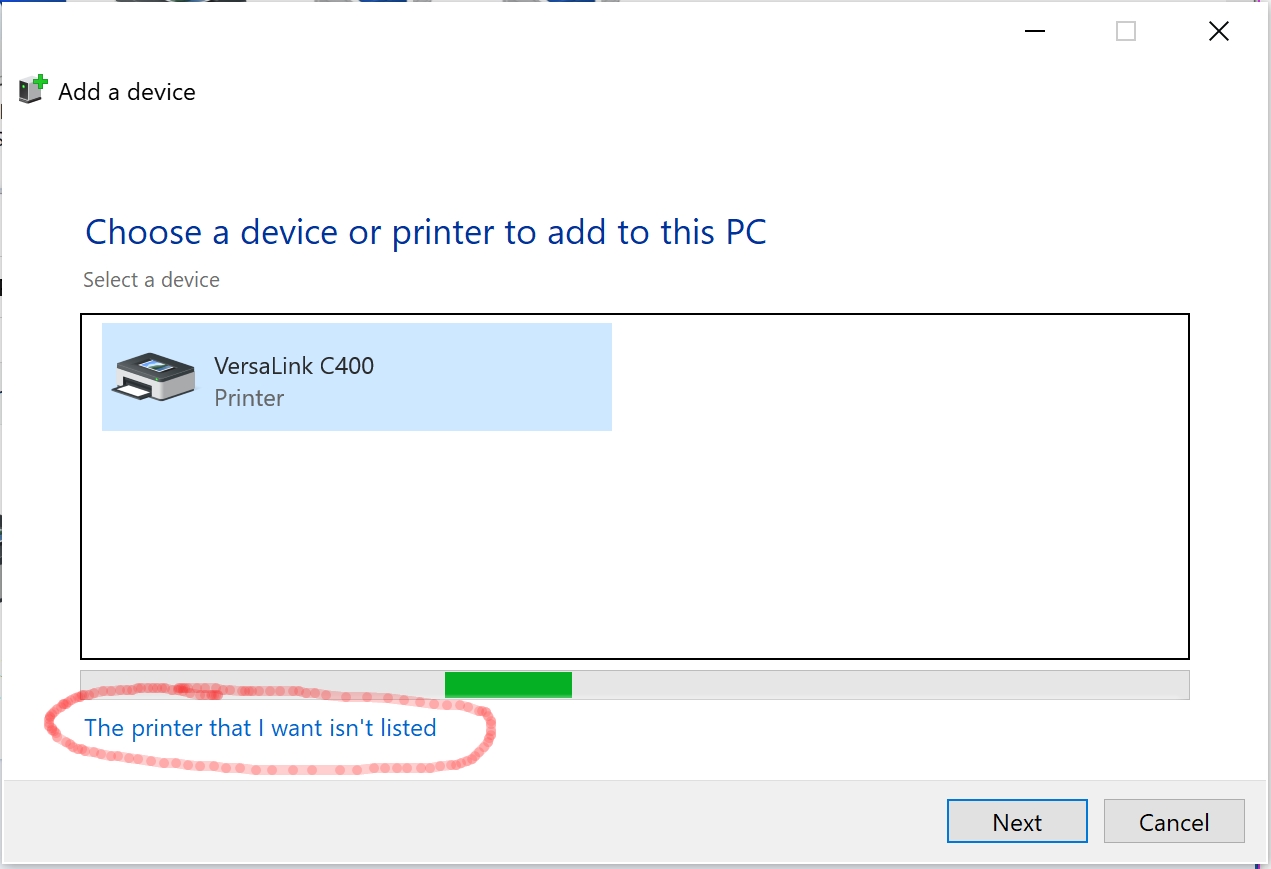
Figure 2. Add a Printer – The printer that I want isn’t listed - Click Add a local printer or network print with manual settings radio button and click Next (see figure 3).
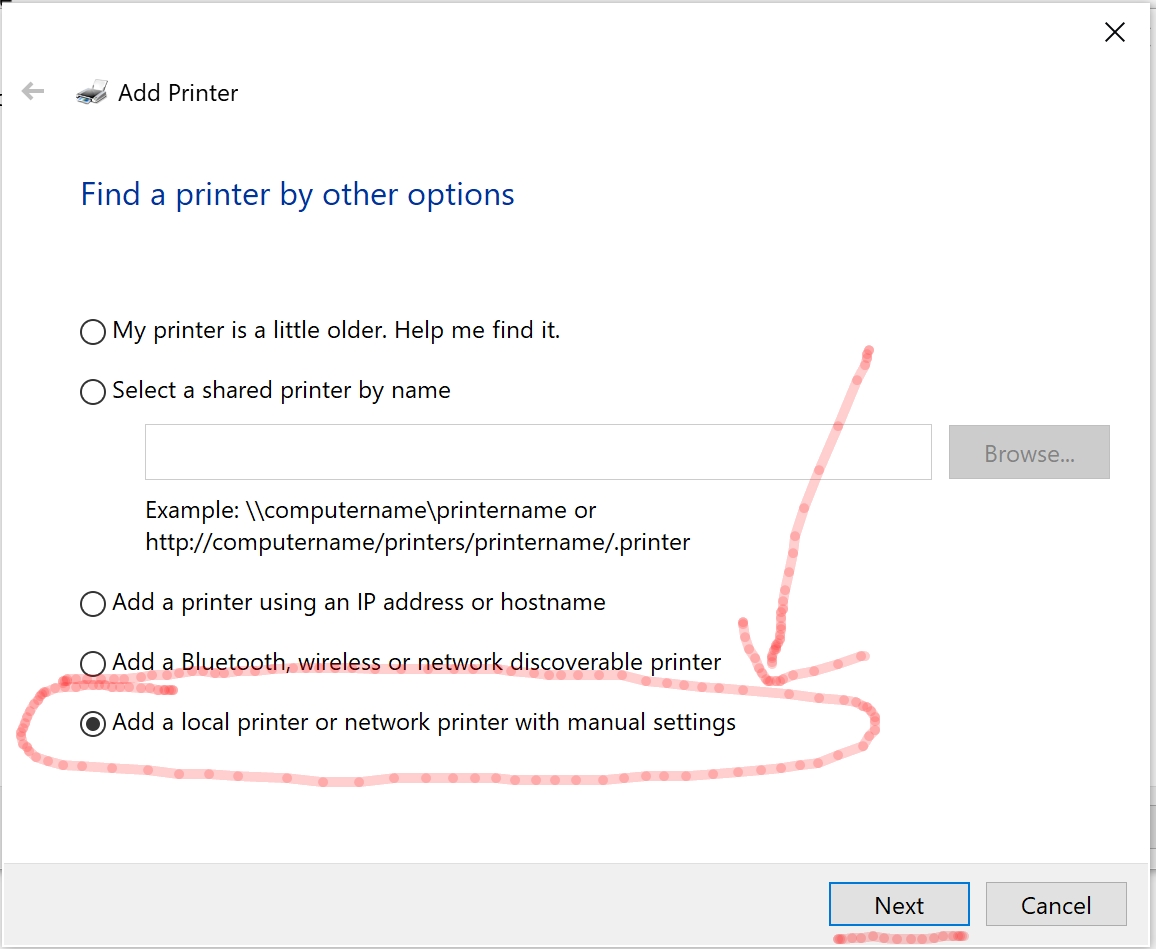
Figure 3. Add a local printer - Click Next on the next screen for Use an existing port: LPT1: (printer port)
- Select the same printer as the ones that you want to redirect to or same model or at least same printer language e.g. Postscript, PCL, etc and click Next (see figure 4).
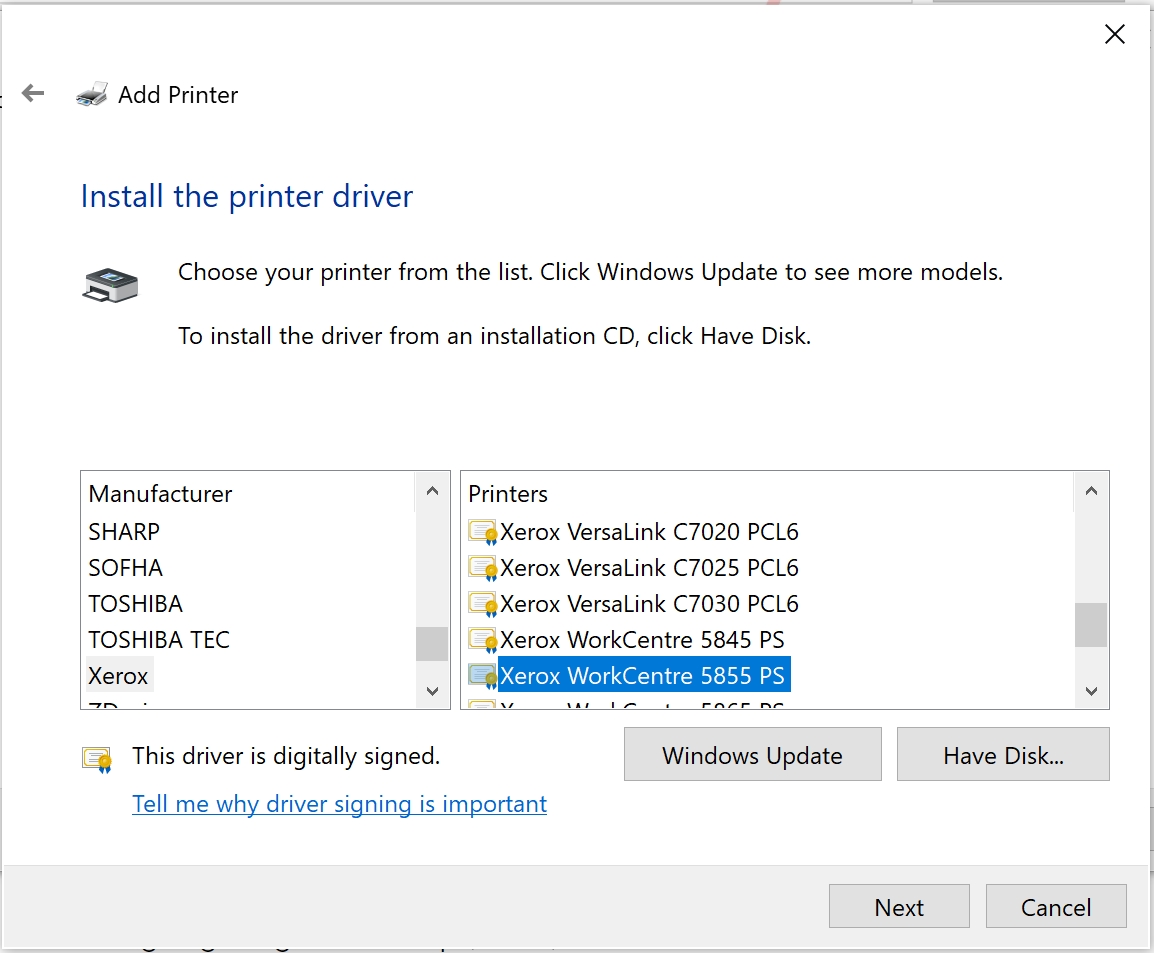
Figure 4. Choose Printer Name/Driver - Click Next to the next screen Use the driver that is currently installed (recommended)
- In the Printer name window enter DUMMY PRINTER at the end of the name, the name doesn’t actually matter but call it that for this tutorial, then click Next (see figure 5).
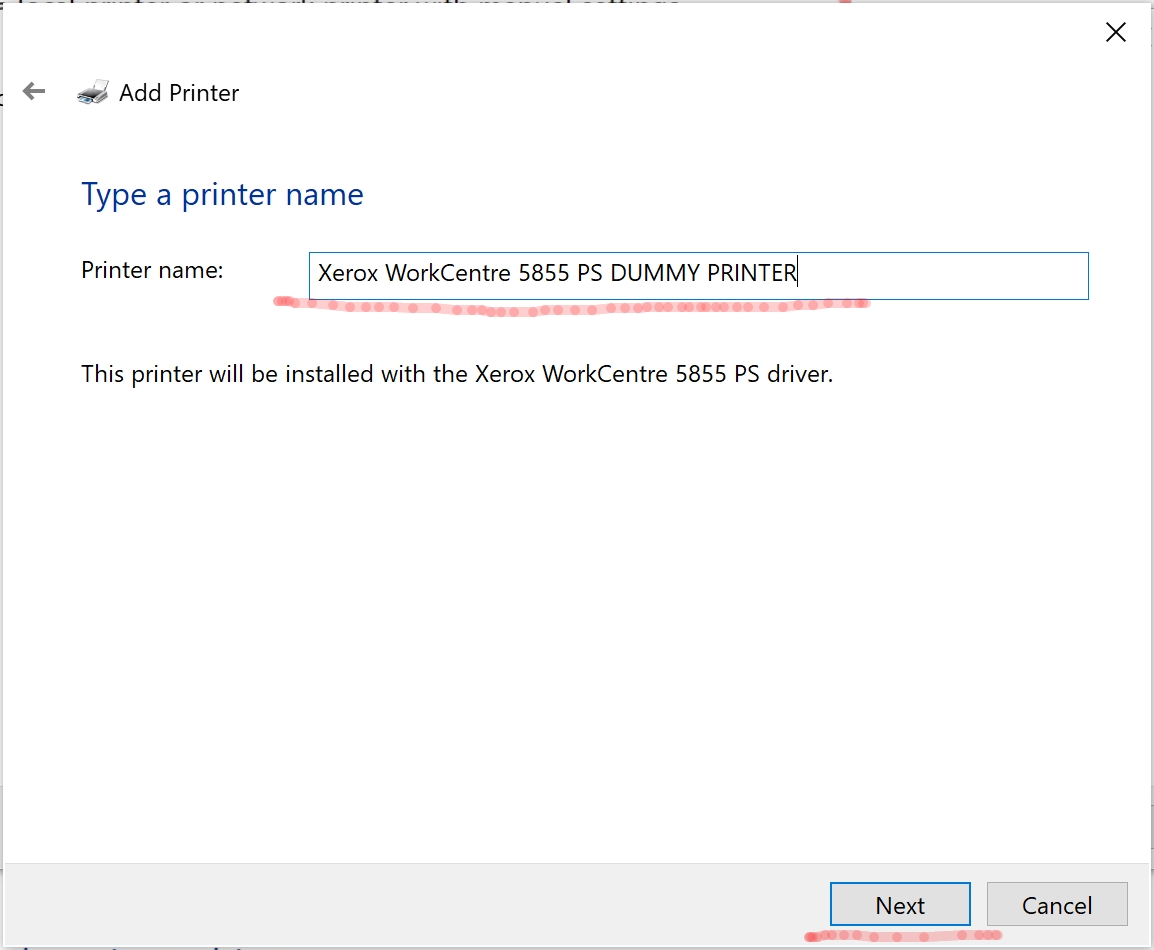 Figure 5. Name your printer for redirection
 - Click Next to the Printer Sharing screen Do not share this printer
- Click Finish on the last screen
- Open Spool Queue Viewer++ Software
- Right mouse on the new printer name DUMMY PRINTER you just installed and select Redirect all prints to… (see figure 6).
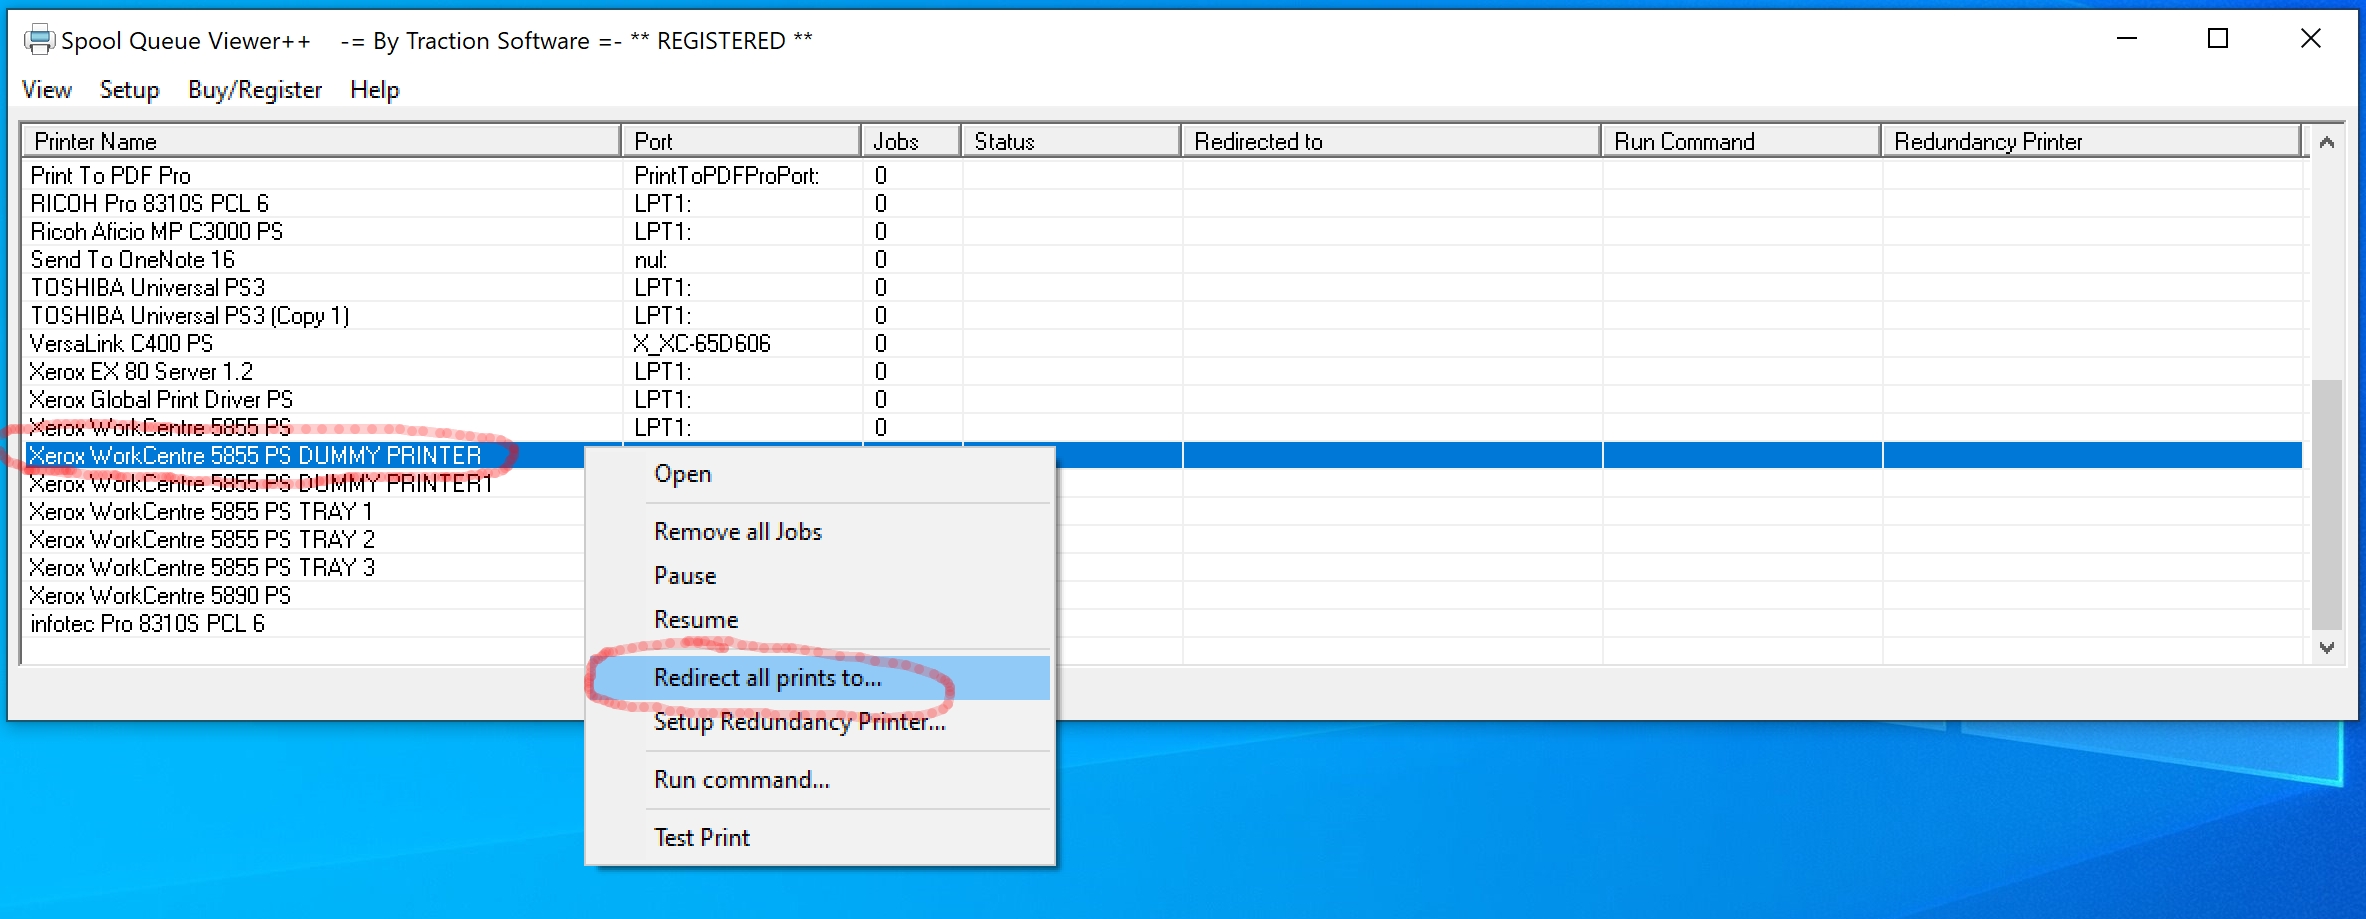
Figure 6. Redirect all prints to… - Select the printers you want to redirect to. to do this hold CTRL key down and left mouse click on the printers, then click OK button. (see Figure 7).
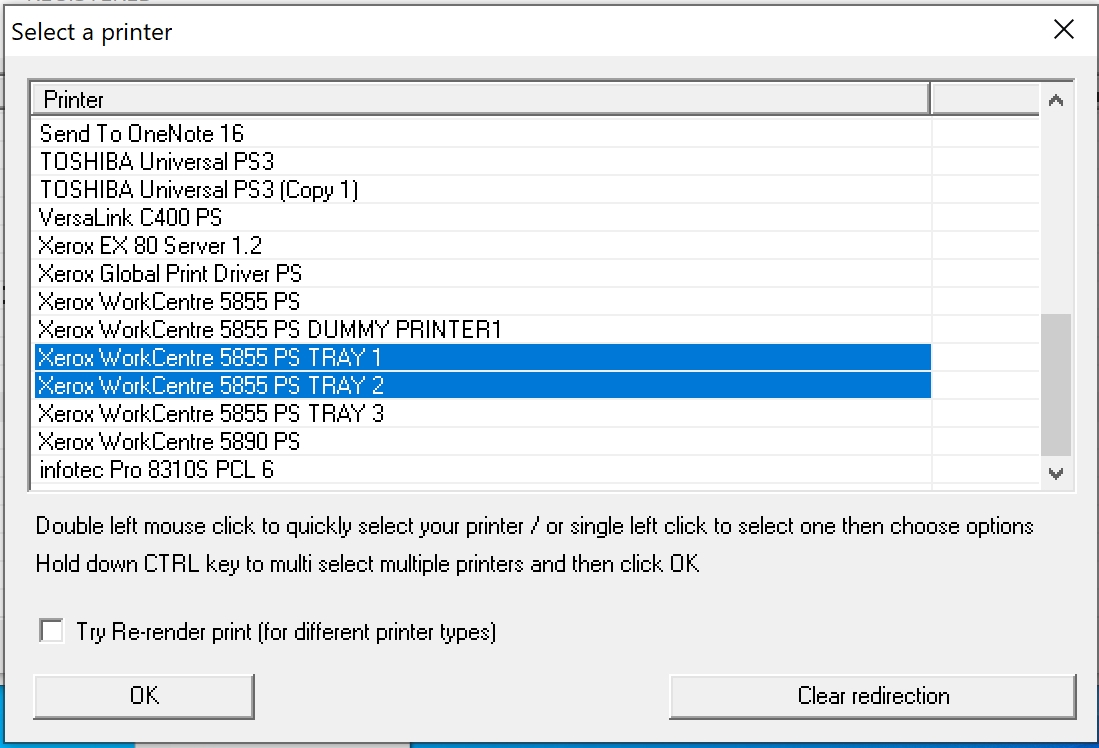
Figure 7. Select Printers - Now print a file to the DUMMY PRINTER or right mouse on the DUMMY PRINTER name in Spool Queue Viewer++ and click Test Print
- You should see the prints automatically appear on the printers you are redirecting to and it should print the file/test file out. if you have any problems first try checking the Try Re-render print option in the printer redirection setup first. (see Figure 7).
Bonus: How to Convert Any Print Job back to PDF
NOTE: This method only works with certain printer drivers, Most Postscript and PCL drivers should be fine.
18. Open the printer queue list in Spool Queue Viewer++ by double-left Mouse Click on your printer name in the list. (see Figure 8).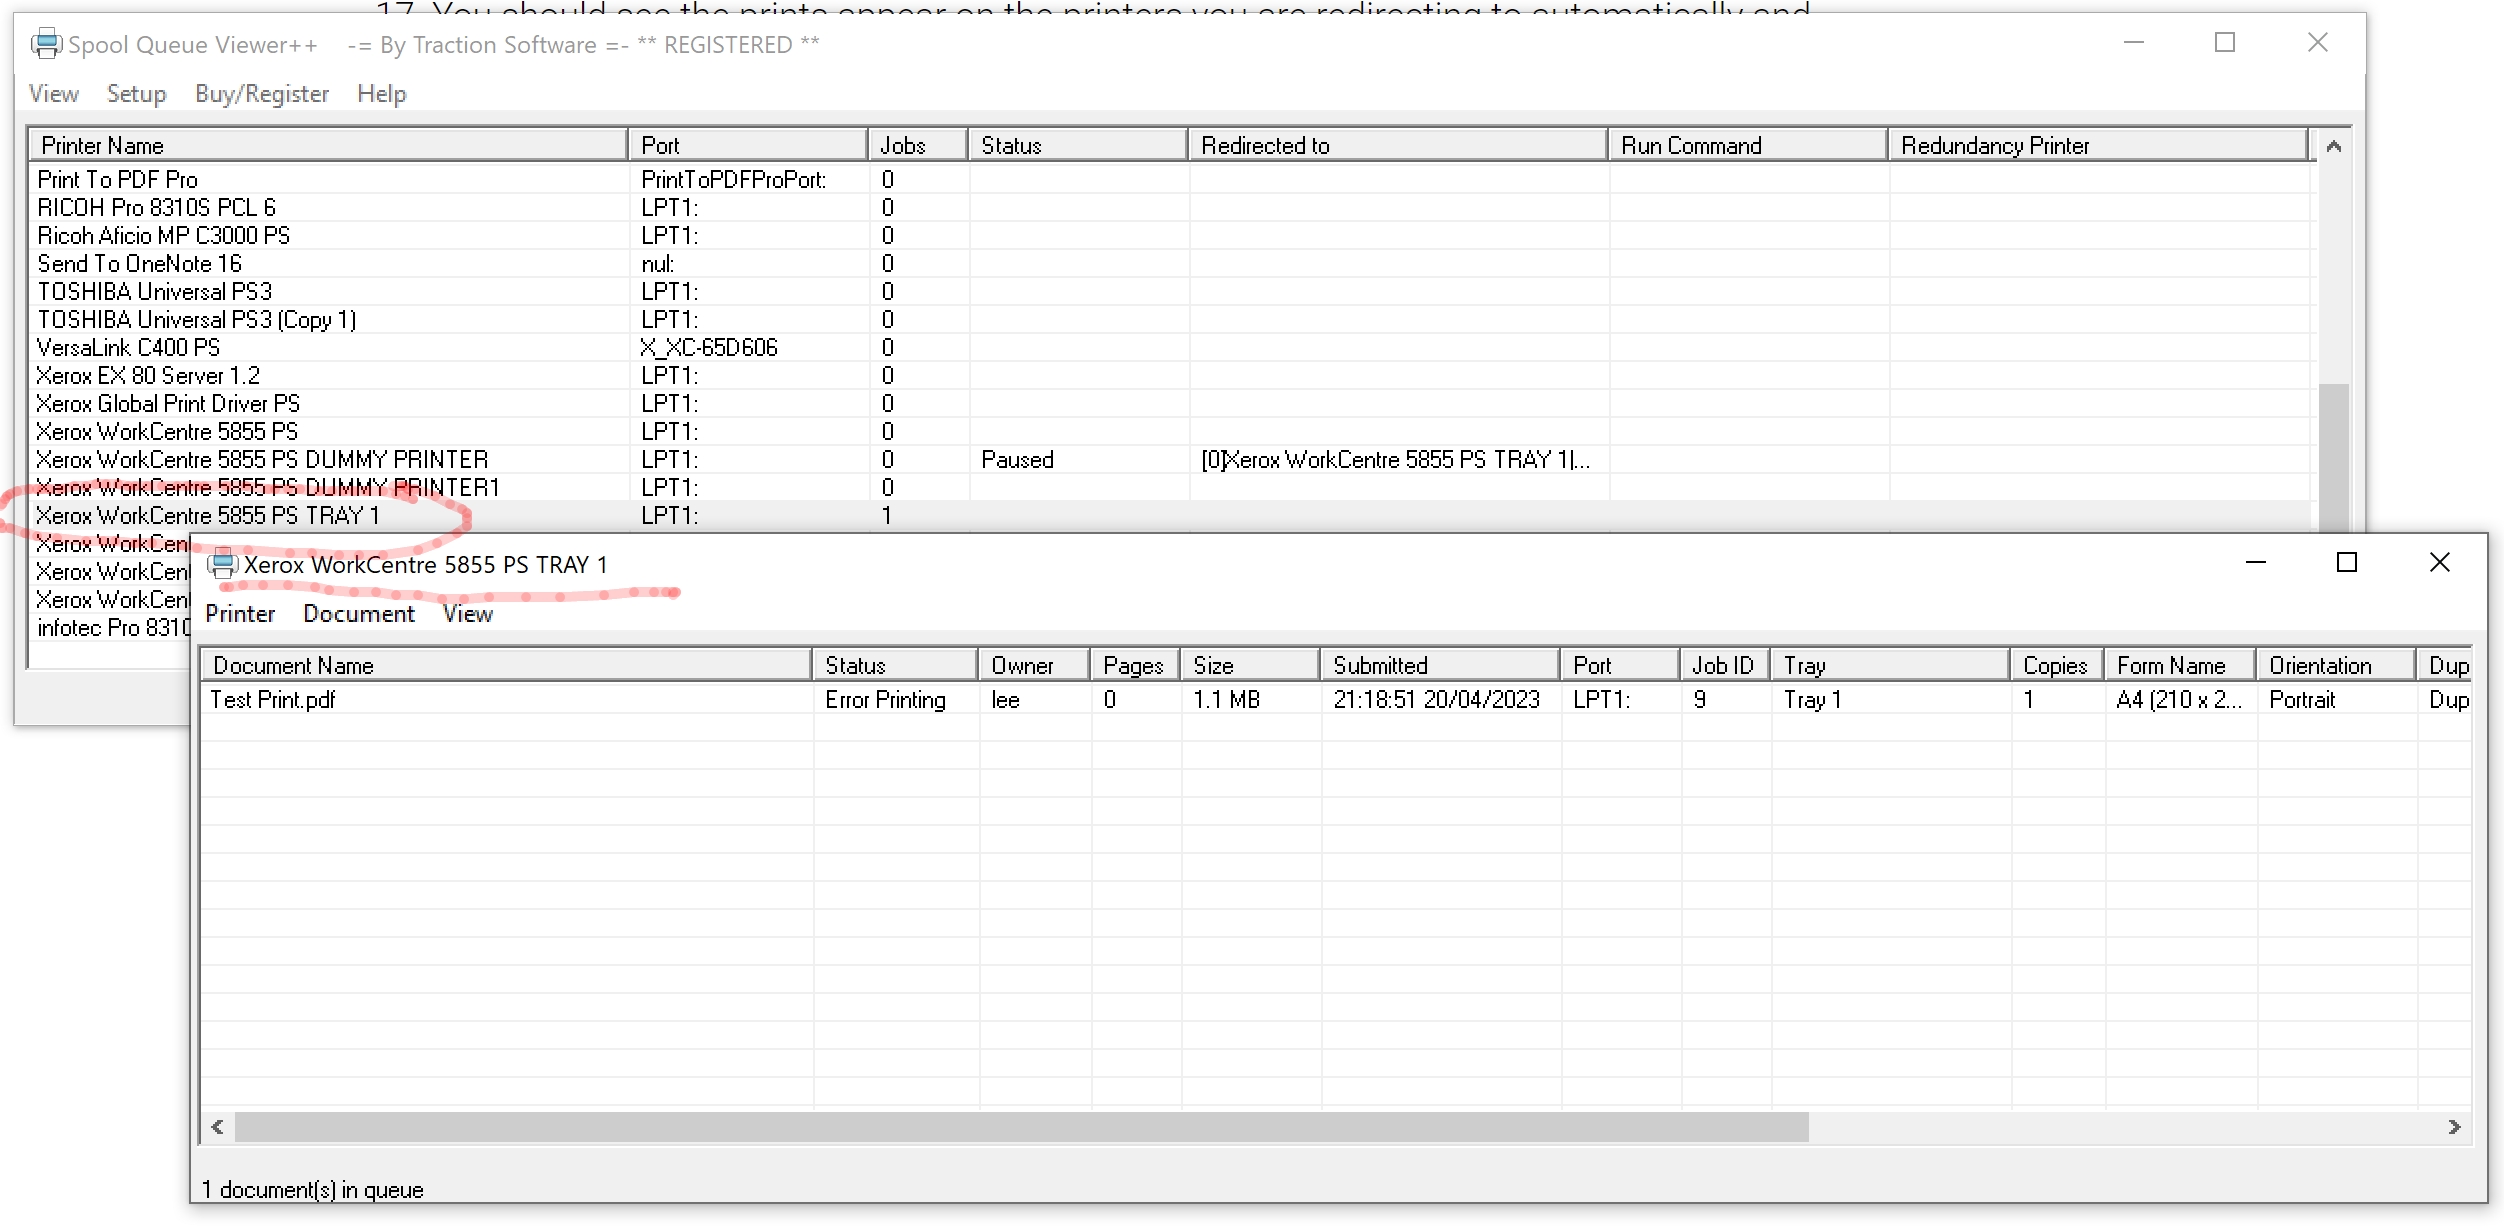
19. Double Left Mouse Click on the print job in the list to convert it to pdf, NOTE: It will automatically view it once converted.
NOTE: If for some reason none are in the list, pause the printer queue in future so you can view them before resuming to print.
All Done!
Related Resources