• Skip to content
  • Skip to secondary menu
  • Skip to primary sidebar

Print Tips

Printing Tips Guides and Videos to Help You Out!

  • Home
  • Home Printing
  • Business Printing
  • Printing Software
  • YouTube

How to Create a Collage from Multiple Photos & Print or Save with Adobe Acrobat Pro

April 19, 2023 by leemidgley_n69998tp

This tutorial shows how to create and print a collage from multiple photos. 
So you have many photos on your camera you want to print out as a collage and don’t know how to do it? then this tutorial is perfect for this purpose, simple and easy to follow guide and video. 
See the instructions below for a simple step-by-step process that anyone can follow, in this guide we use Adobe Acrobat Pro to print multiple photos onto just a few pages depending on the number you require on a page.

Table of Contents:

  • How to Create a Collage from Multiple Photos
  • How to Change the Print Quality, Re-Organize & Rotate Photos for Better Results

Watch all the steps shown here in real time!

Explore more printing-related software tutorials on our YouTube channel.

The images below are from Adobe Acrobat Pro on Windows 10. These steps also apply to Adobe Acrobat 2020, Adobe Acrobat 2017, and updated versions of Acrobat Acrobat Pro on a PC.

How to Create a Collage from Multiple Photos

To start with this tutorial presumes you have your photos / images on your PC or Mac computer in a folder you have access to and you have Adobe Acrobat Pro installed. Please see the example video provided.

Step-By-Step Guide

  1. Connect your computer to the printer and ensure the printer is turned on.
  2. Open the Folder where your Photos are located.
  3. Open Adobe Acrobat Pro
  4. Select the Photos by using Select All or by using SHIFT key, left mouse select first photo then left mouse on the last photo
  5. Drag and Drop the Photos straight into Adobe Acrobat Pro (hold left mouse down on photos selected and move mouse into Acrobat main window and release), this will convert all the photos/images into PDF pages, one page per photo.
  6. Select the Print button in the toolbar (see figure 1). (If the Print button is not in your toolbar, select File > Print.)
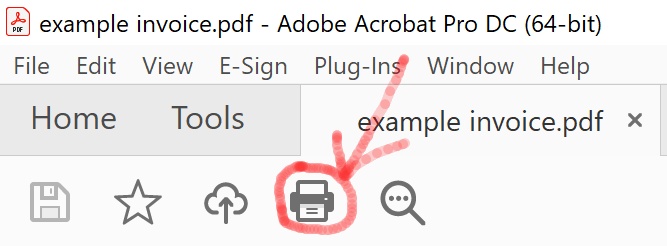
Print both sides of the paper on a non duplex printer, any printer
    Figure 1. Print button
     
  7. Ensure the correct printer is selected in the Print dialog box (see figure 2).
    Select printer for printing
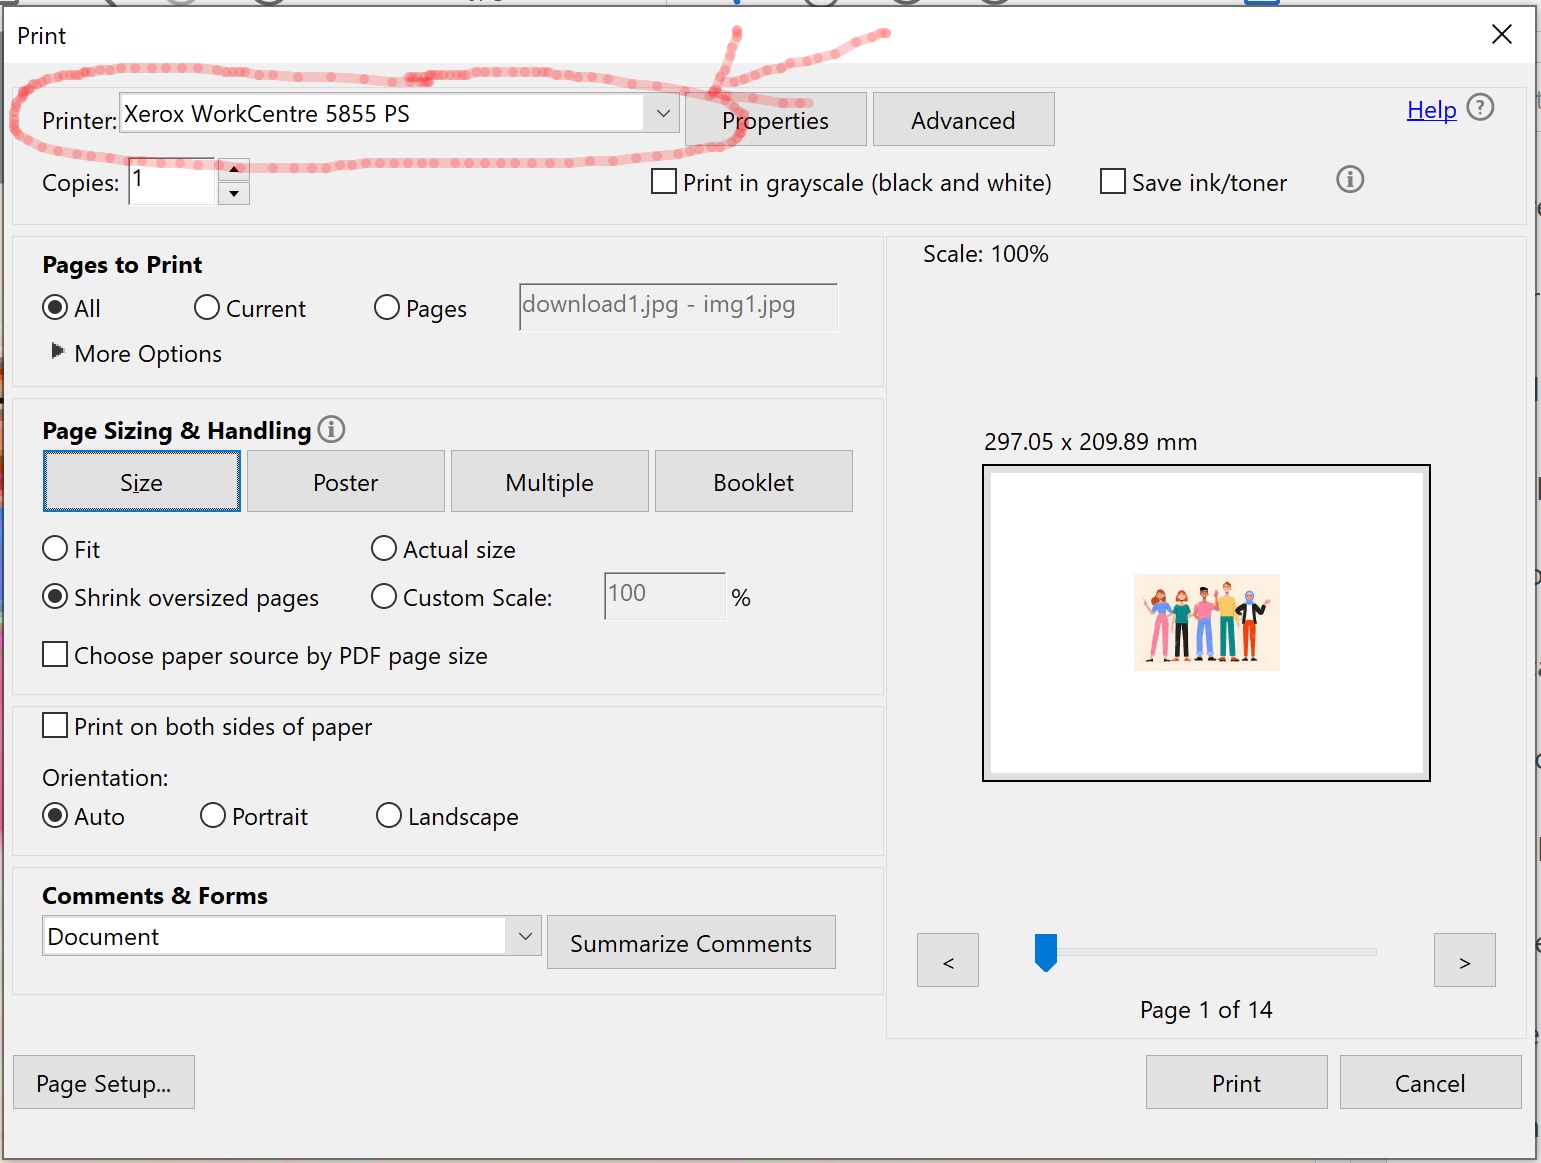
Figure 2. Printer menu  
  8. Select Multiple. (see figure 3)

Printing

6. Select Custom… from the Pages per sheet menu (see figure 3).
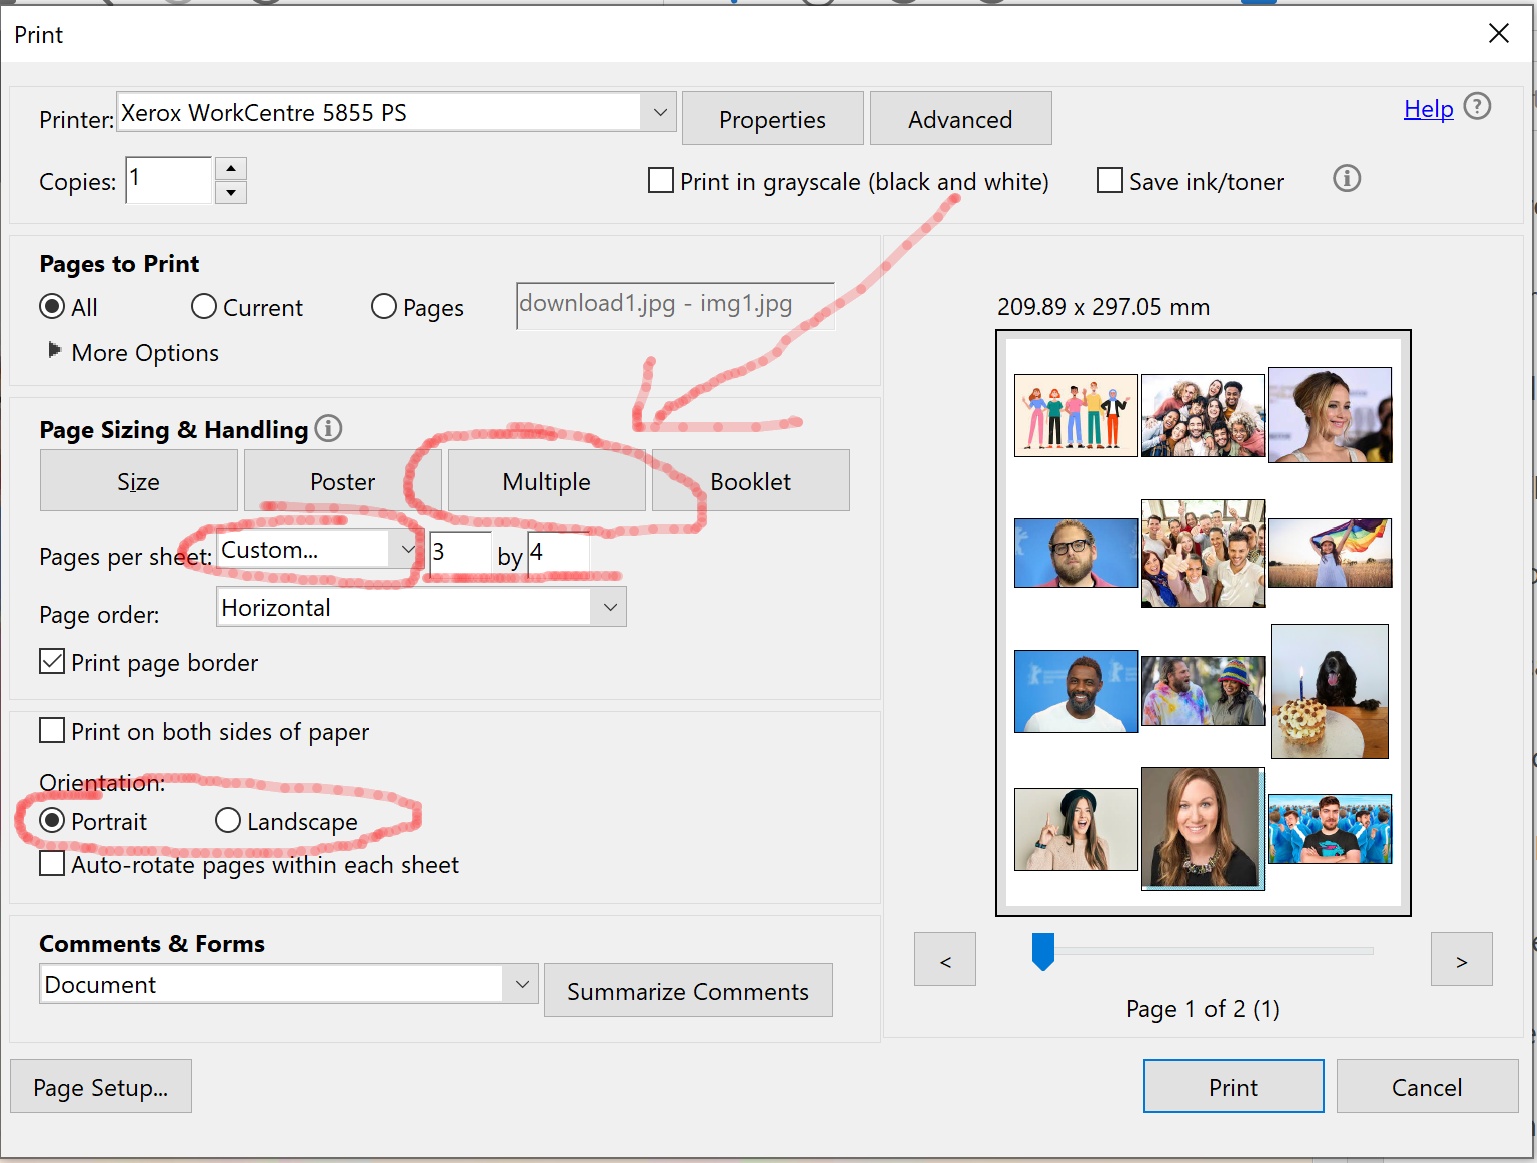
Print multiple photos on one page

Figure 3. Custom options.
(n) by (n)

7. Enter e.g. 3 by 4 for 3 rows across of Photos and 4 rows down of Photos (see figure 3).

8. Ensure that the Print on both sides of paper checkbox option is not selected, this is so you can print and put each sheet of paper on e.g. a wall or notice board etc (see figure 4).
Ensure print on both sides of the paper is unchecked for collage printing to put on a wall

Figure 4. Print on both sides of paper option

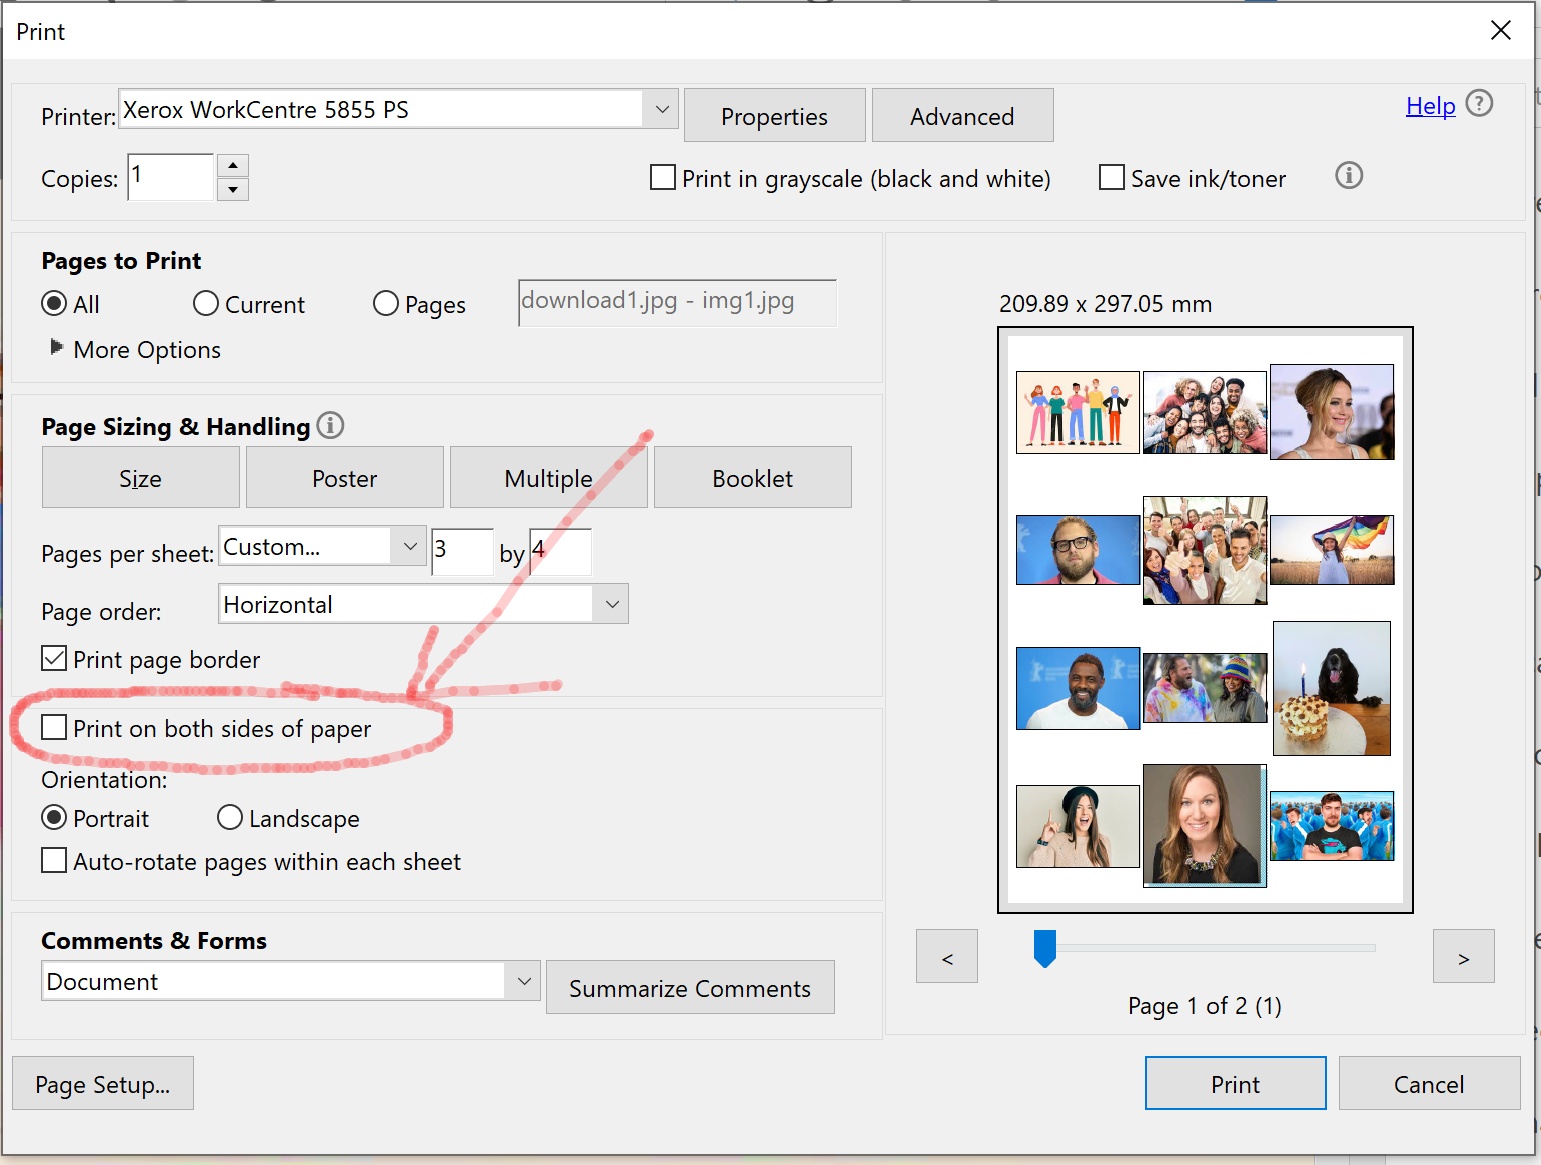
9. To print click the Print button (see figure 5).
Print in Adobe Acrobat

Figure 5. Print

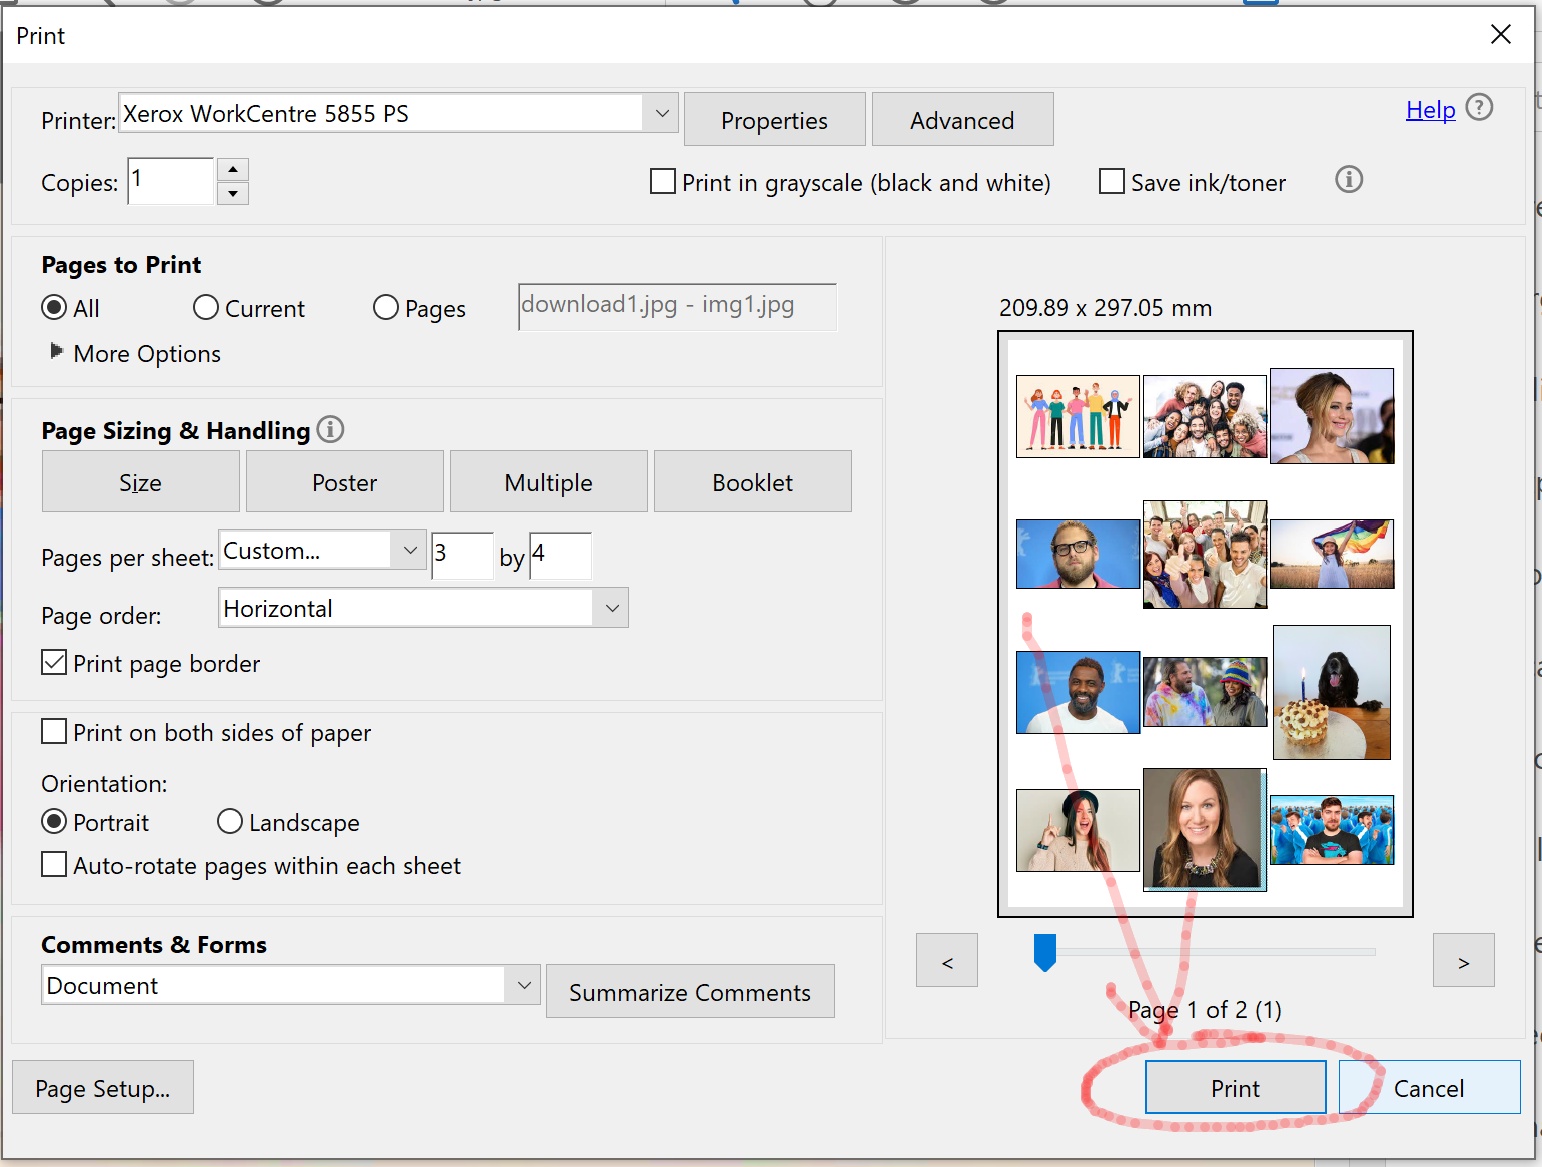
How to Change the Quality, Re-Organize & Rotate Photos for Better Results

10. Repeat steps 1 through 5 to return to the Multiple section in the Print window (see figure 3).

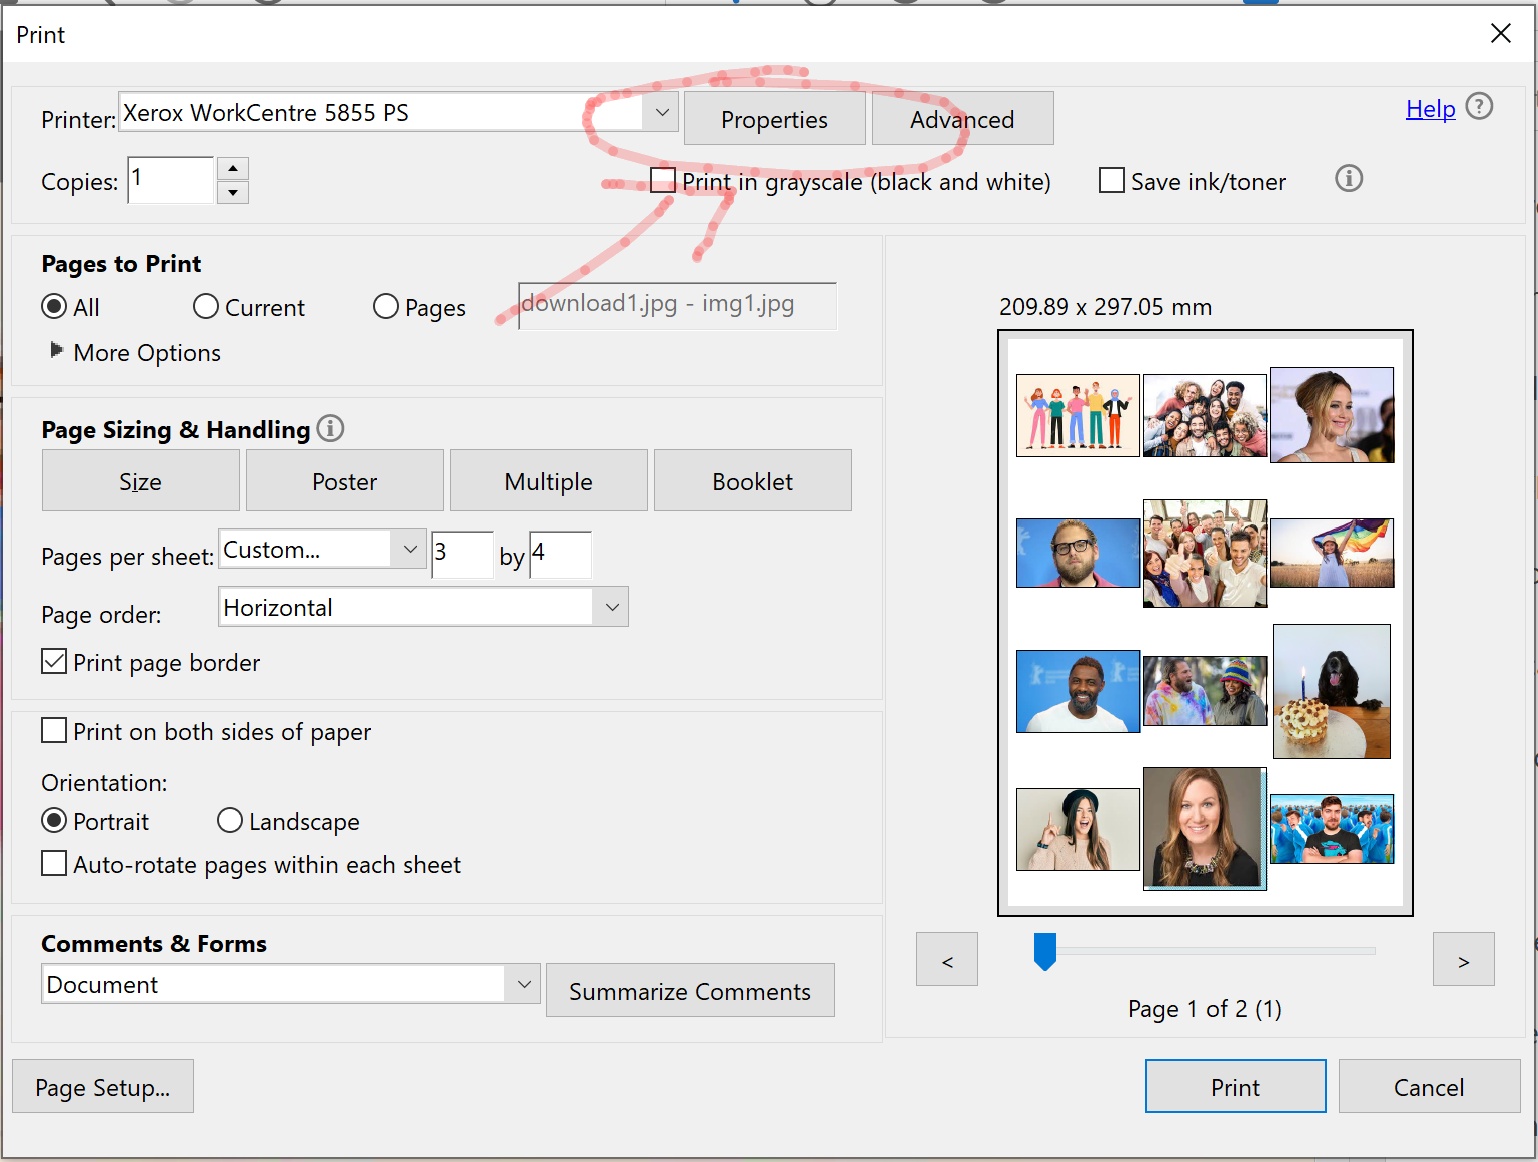
11. To enhance the print quality click on Properties in the Adobe Acrobat Print window (see figure 6).

change the print quality in print properties in adobe acrobat

Figure 6. Print Properties

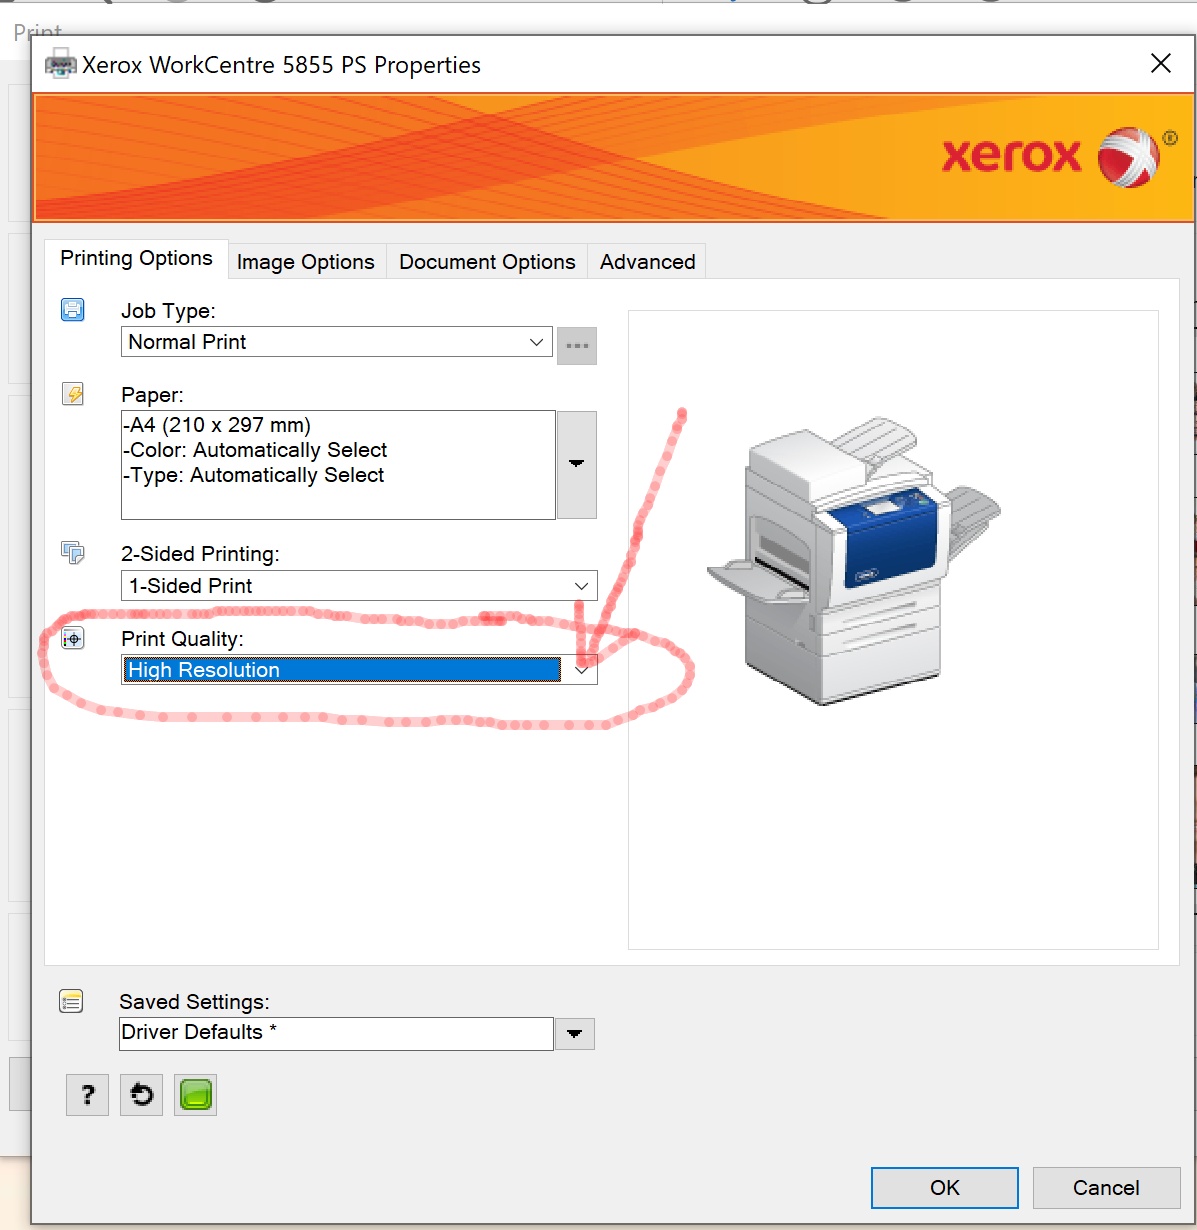
11. Select High Resolution from the print quality option (see figure 7).  and then click the OK button.

NOTE: The quality option will be different for other printers, click through the tabs at the top of the properties to check where the print quality actually is.

Print Properties High Quality

Figure 7. Print Quality option.

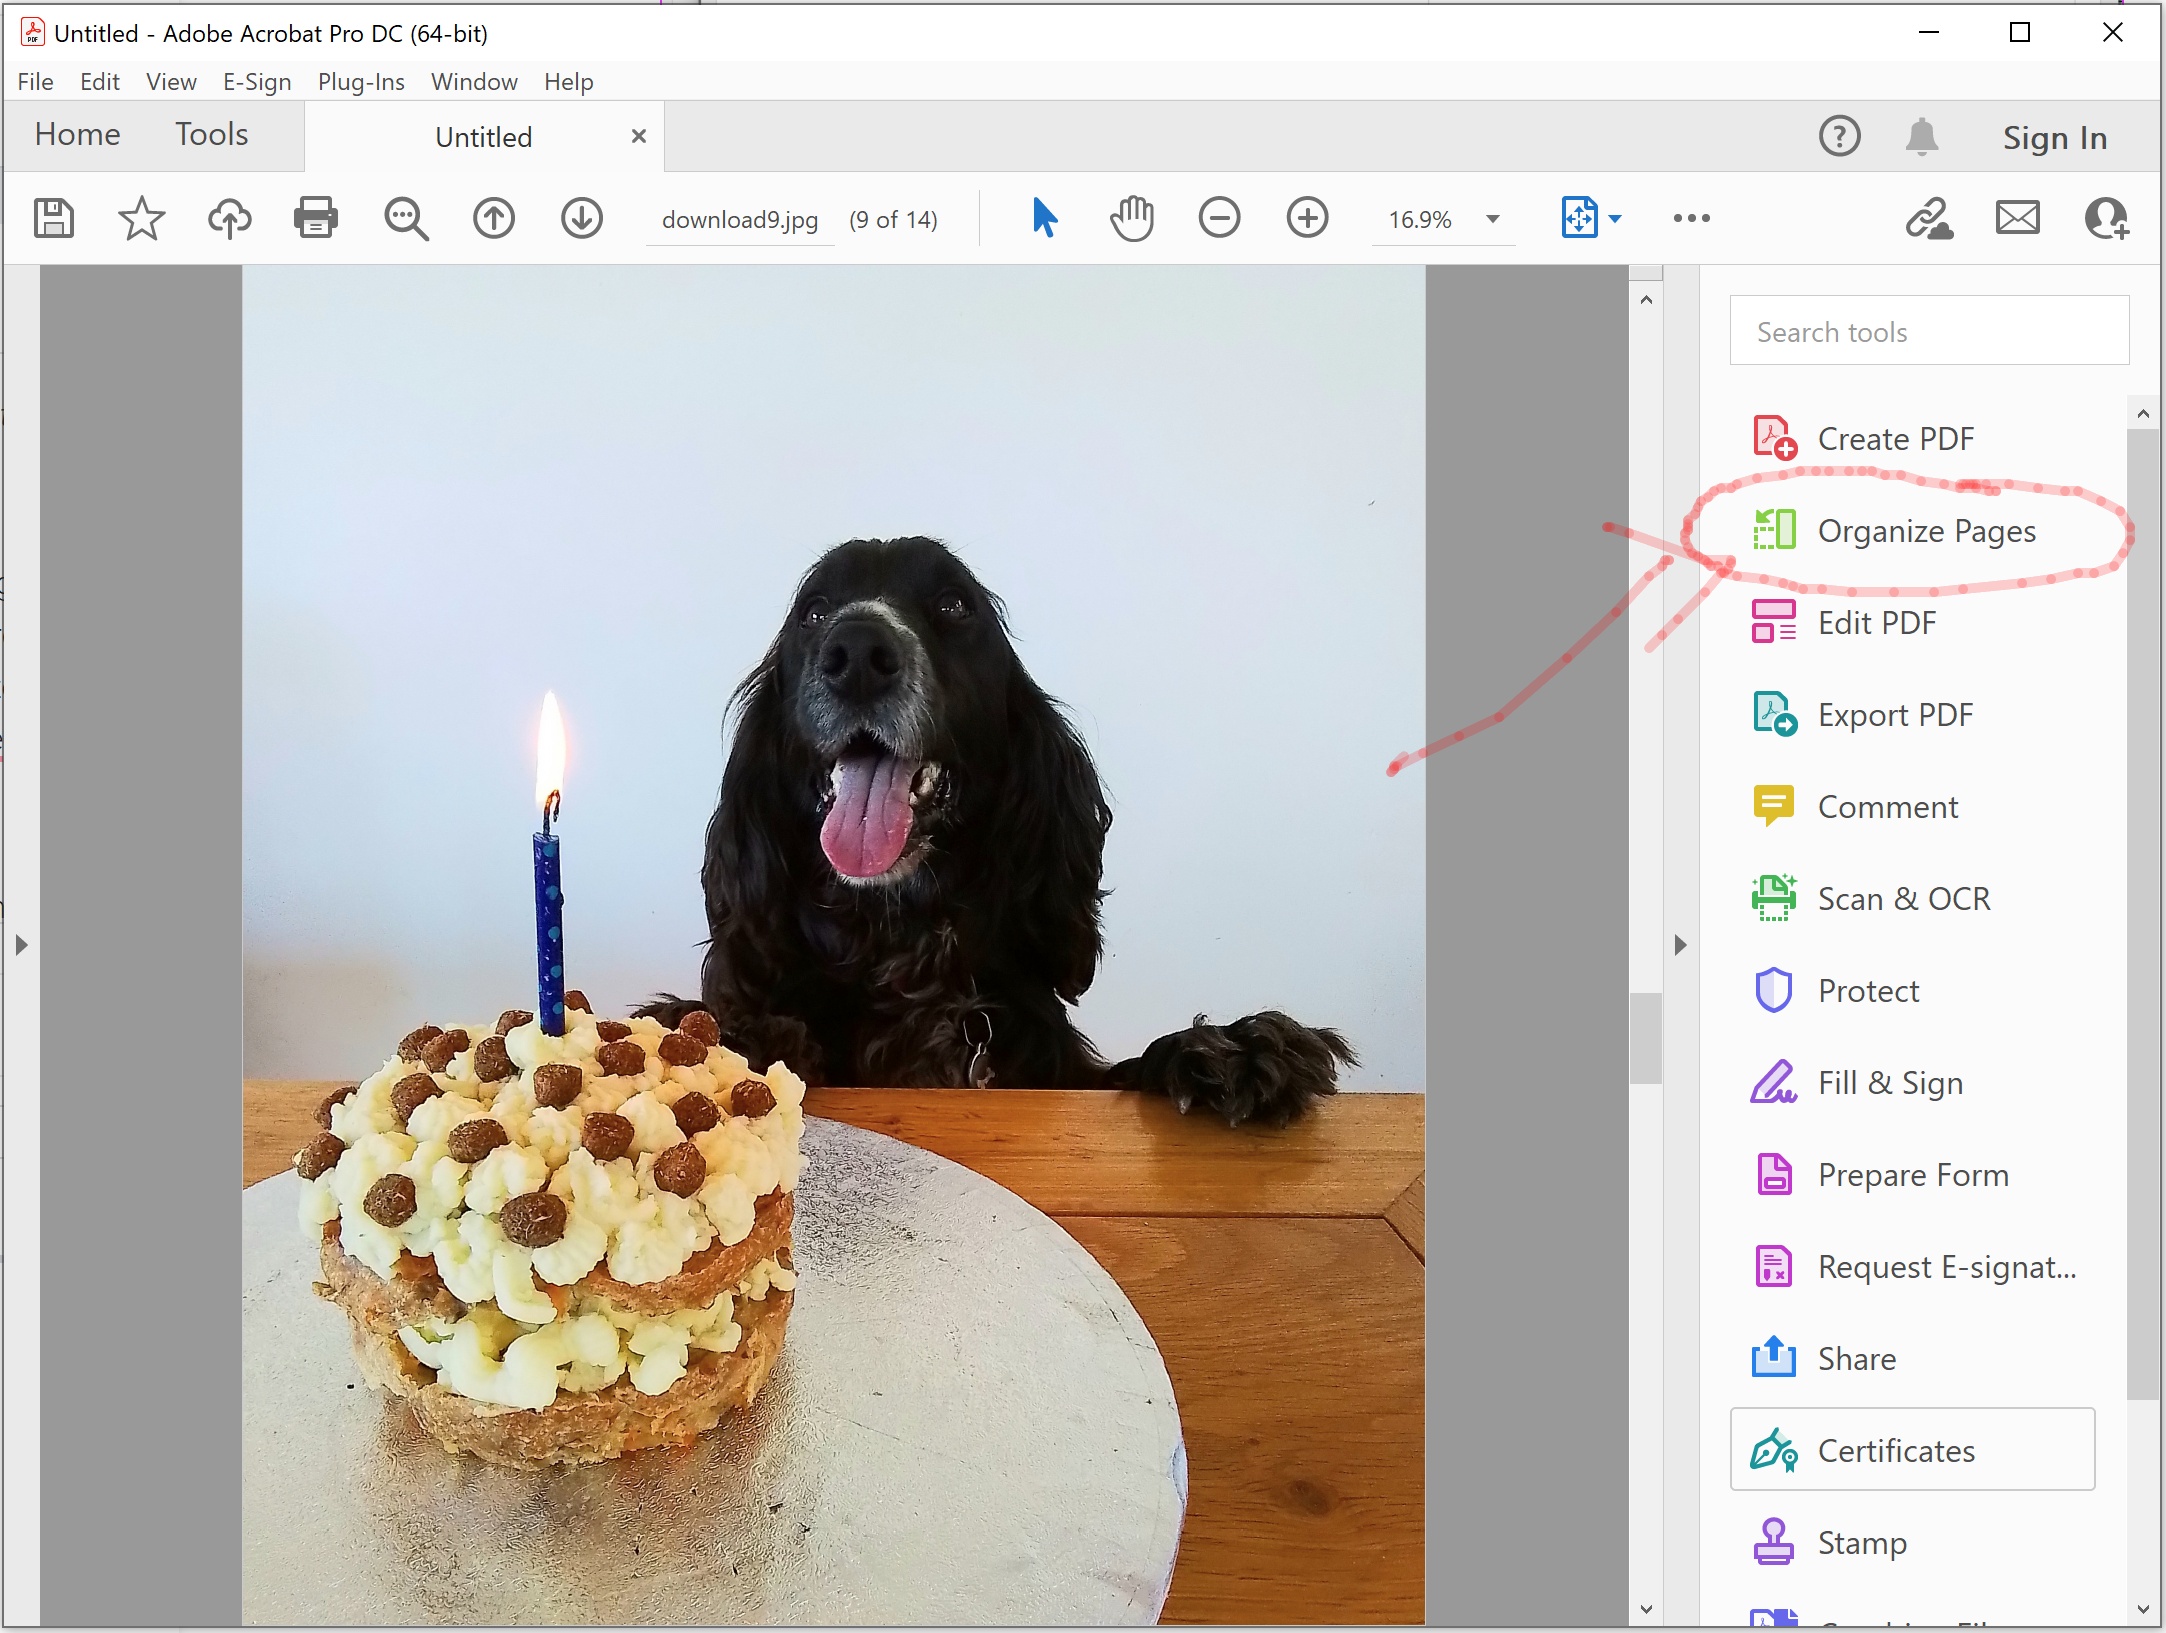
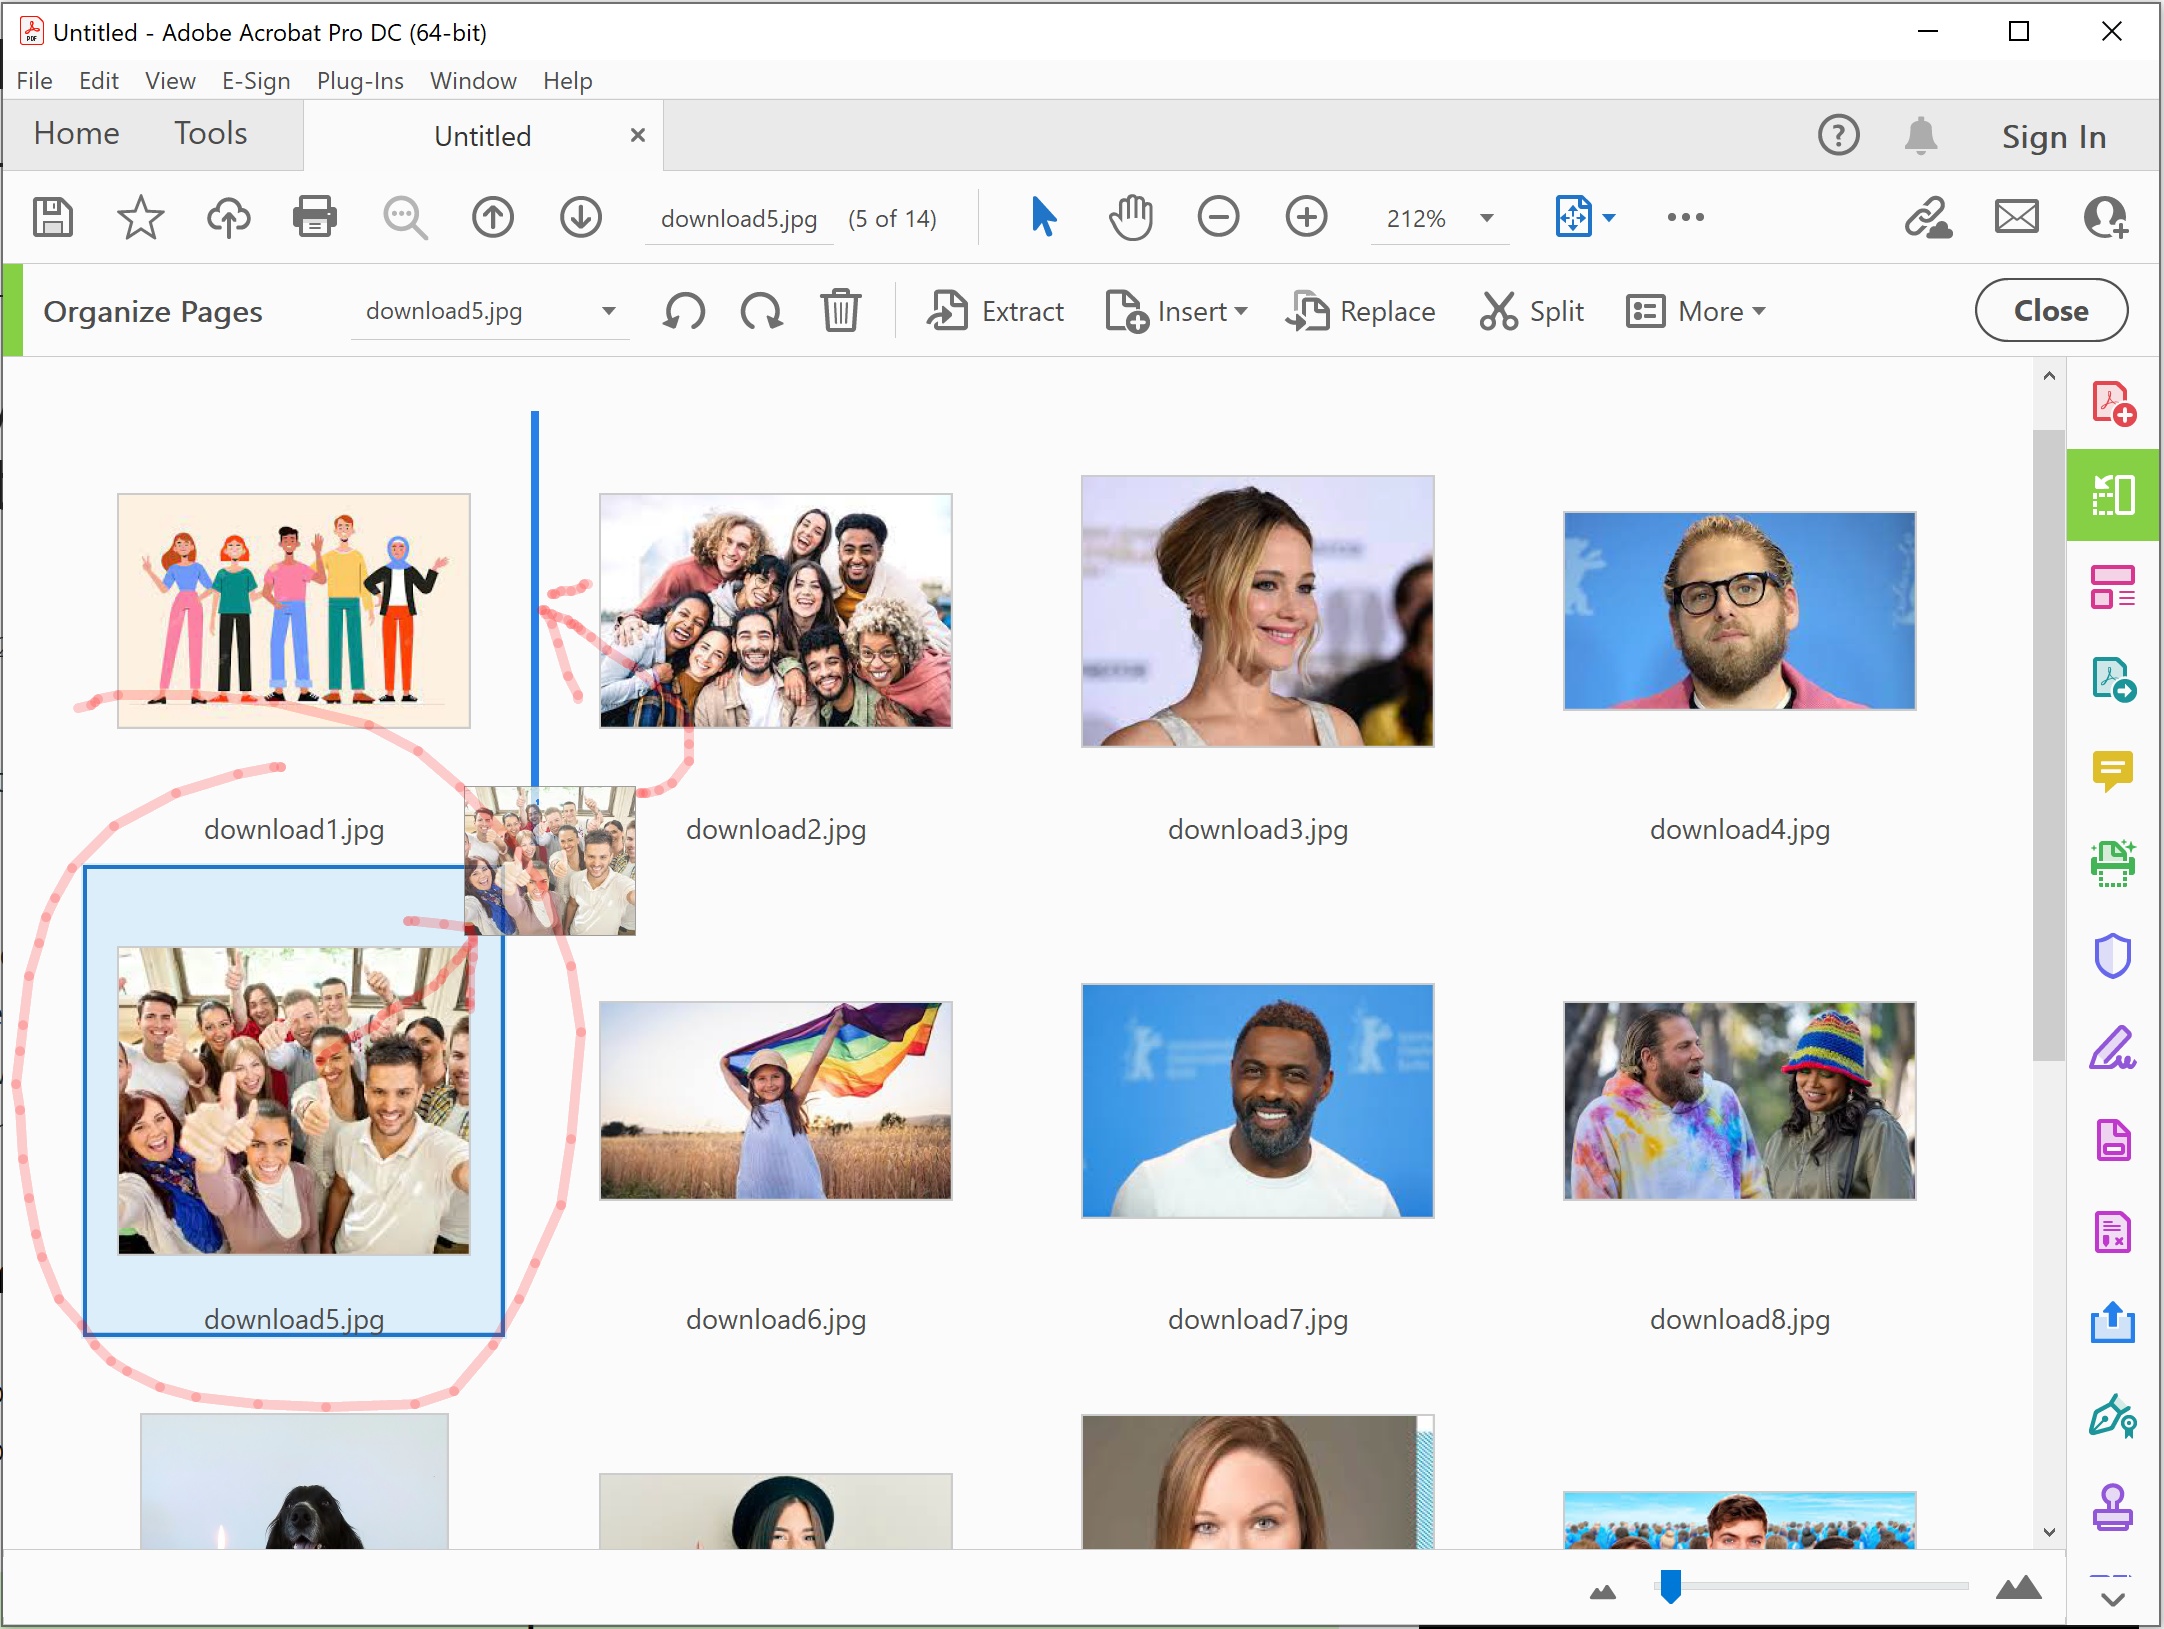
12. To Re-organize the pages to a more favourable print order click Organize Pages button in Adobe Acrobat (see figure 8).

Organize Pages in Adobe Acrobat Pro

Figure 8. Organize Pages option.

13. Left mouse click on the photo to move and drag the mouse over the position to drop and release the mouse button (see figure 9).

How to organize pages in Adobe Acrobat - Drag and Drop Photos

Figure 9. Organize Pages, Use Drag and Drop.

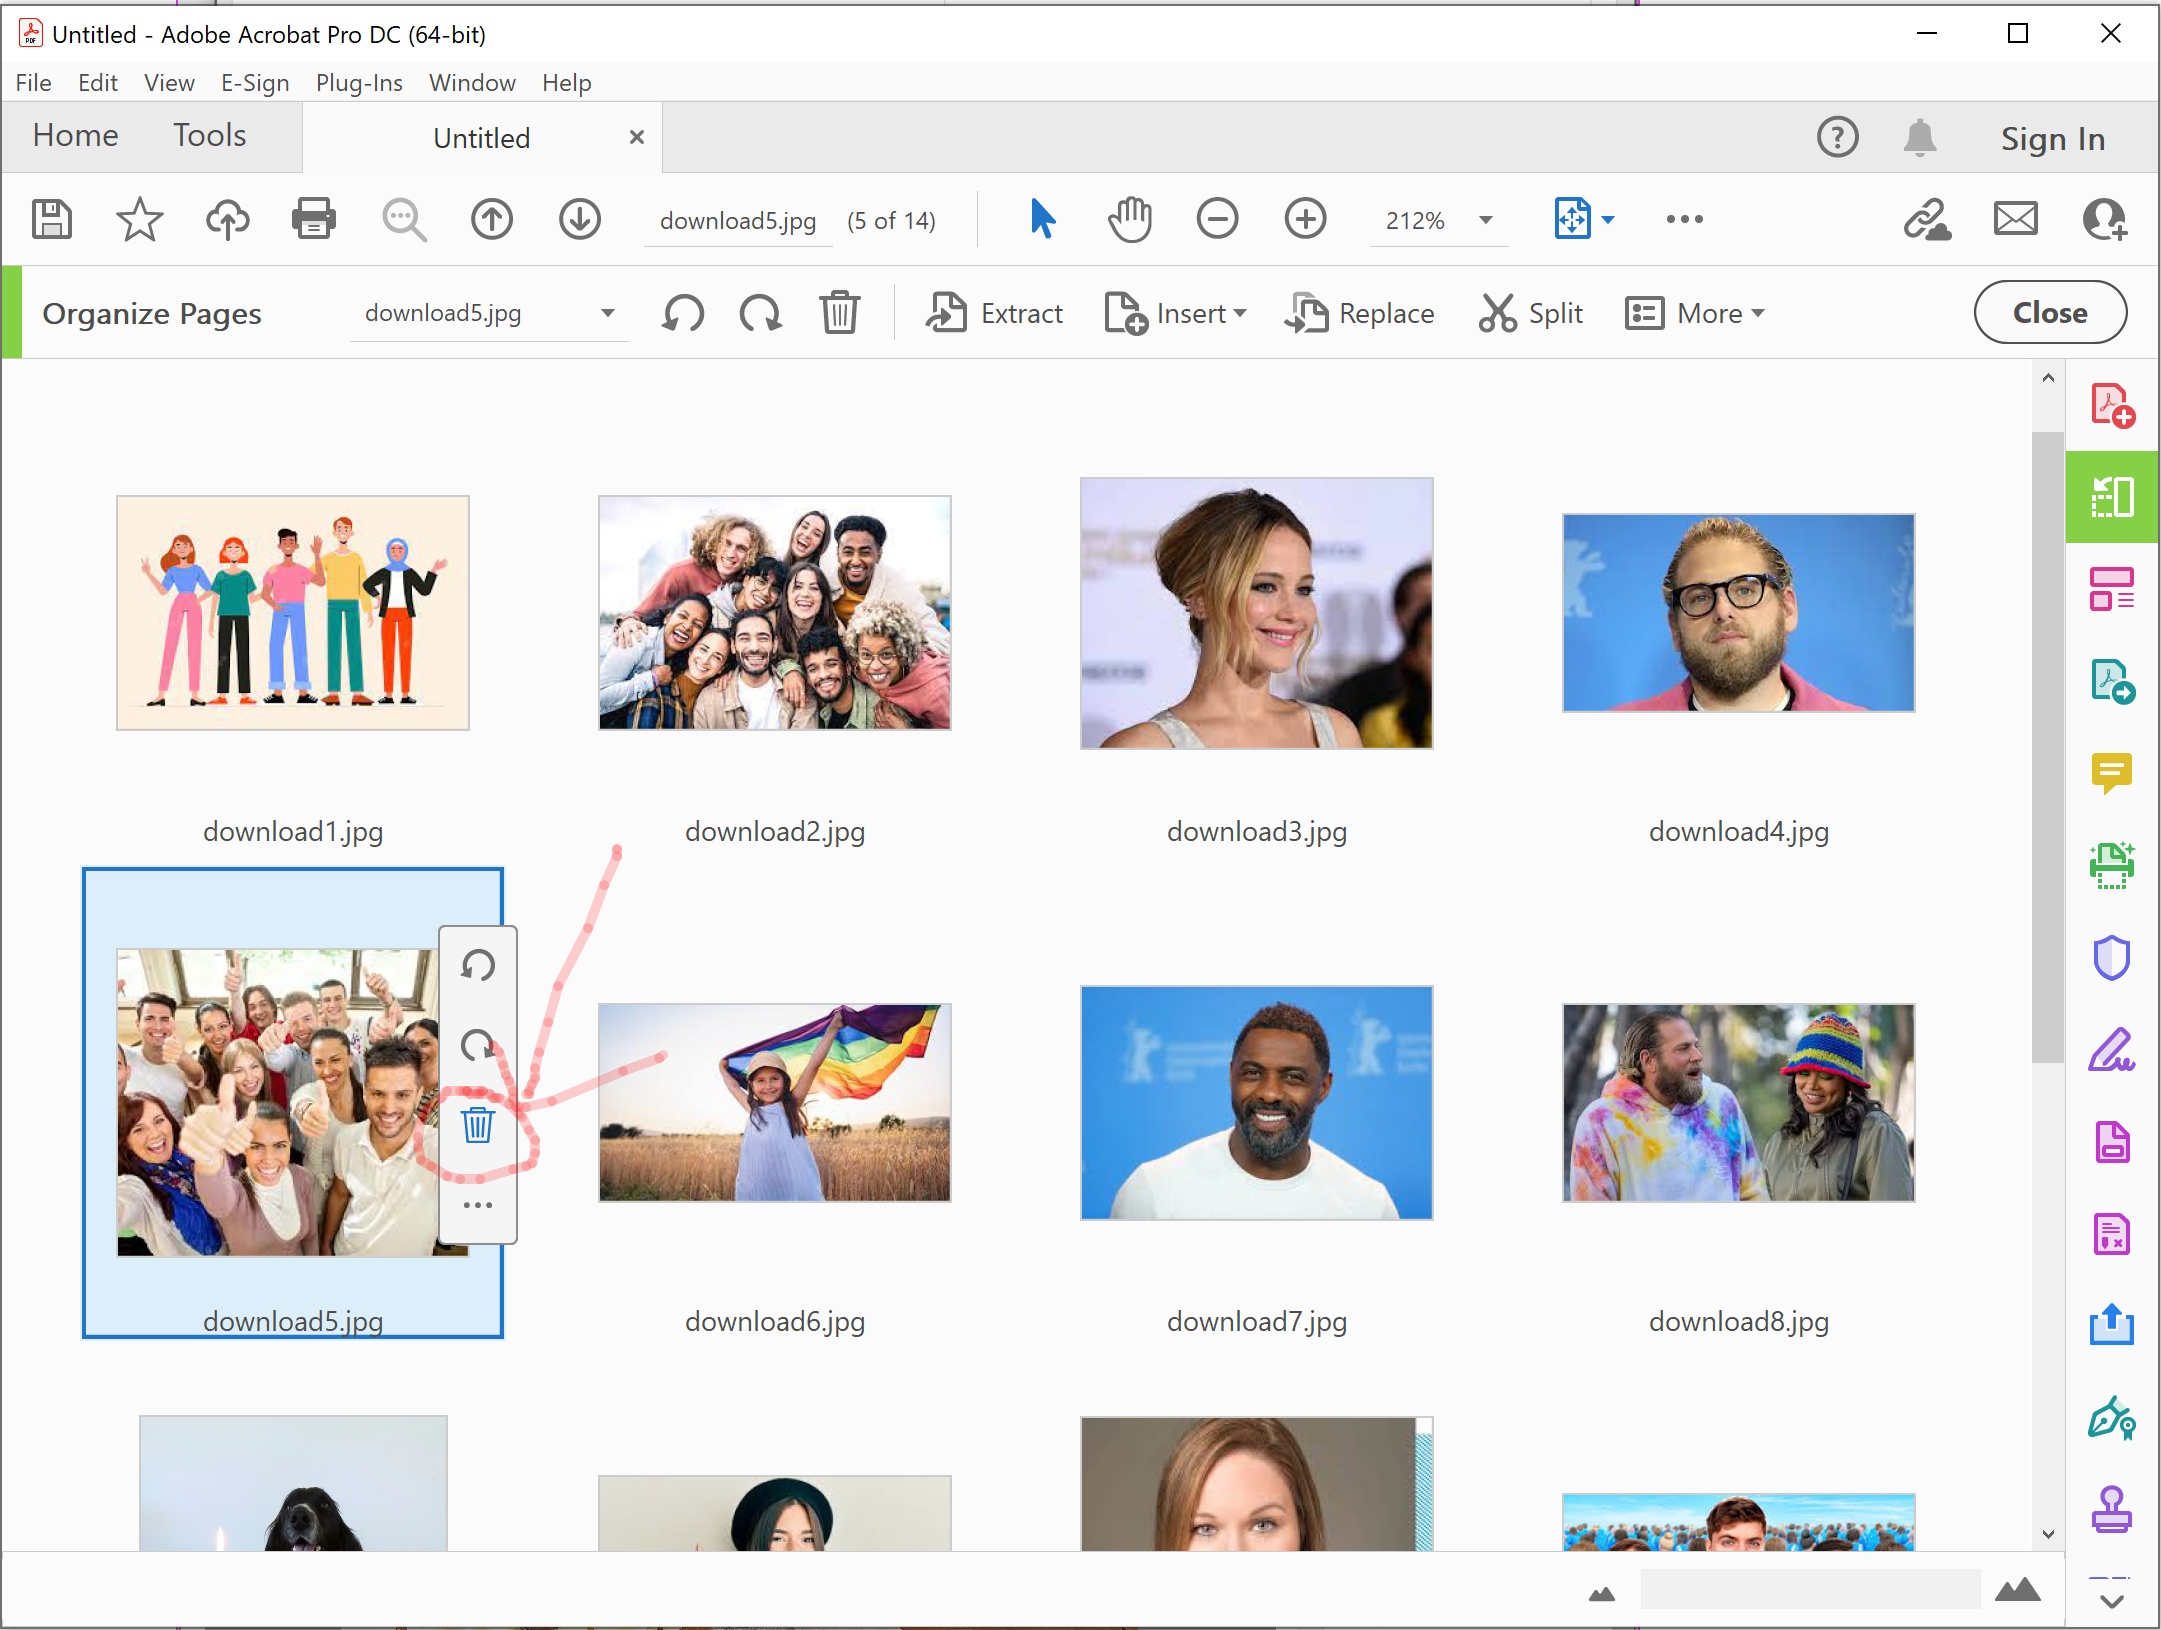
14. To Delete a photo left mouse click on the photo and press the Trash Can icon. (see figure 10).

How to delete pages in Adobe Acrobat

Figure 10. Trash Can

15. To Rotate a photo left mouse click on the photo and press the Rotation Symbol, Left or Right. (see figure 11).

How to rotate pages in Adobe Acrobat

Figure 11. Rotate

16. Repeat steps 1-5 to print.

All Done!

Related Resources


Filed Under: Home Printing

Reader Interactions

Primary Sidebar

RECENT TUTORIALS

  • Batch print files in order of page count
    How to Batch Print Files in Order of Number of Pages
  • This list of the common American and European paper sizes includes the ISO standards
    Paper Page Sizes in Metric and Imperial points, picas, pixels, inches, mm & cm
  • Print PDF's on the command line, print on demand
    How to Batch Print PDF Files from the Command Line in Windows
  • How to get a list of files in a folder and print them
    How to Get a List of Files in a Folder and Print Them
  • How to automatically print pdf files placed in a folder
    How to Automatically Print PDF Files Placed in a Folder

EXPLORE MORE TUTORIALS

  • HOME PRINTING
  • BUSINESS PRINTING
  • PRINTING SOFTWARE

LETS CONNECT ON SOCIAL

Facebook
Instagram
Twitter
Pinterest
YouTube

Copyright © 2025 · Magazine Pro on Genesis Framework · WordPress · Log in