How to Change the Margins with a Pre-Set Margin
To start with this tutorial presumes you have your standard Word Document ready to open on your PC or Mac computer in a folder you have access to and you have Microsoft Word installed.
Please see the example video provided.
Step-By-Step Guide
- Connect your computer to the printer and ensure the printer is turned on.
- Open the Folder where your Word file is located.
- Open Microsoft Word.
- Either double-click on the source Word in File Explorer or Drag and Drop the Word file straight into Microsoft Word (hold the left mouse down on the pdf file selected and move the mouse into Microsoft Word main window and release), this will open the Word file in Microsoft Word.
- Select the Layout tab in the toolbar (see Figure 1).
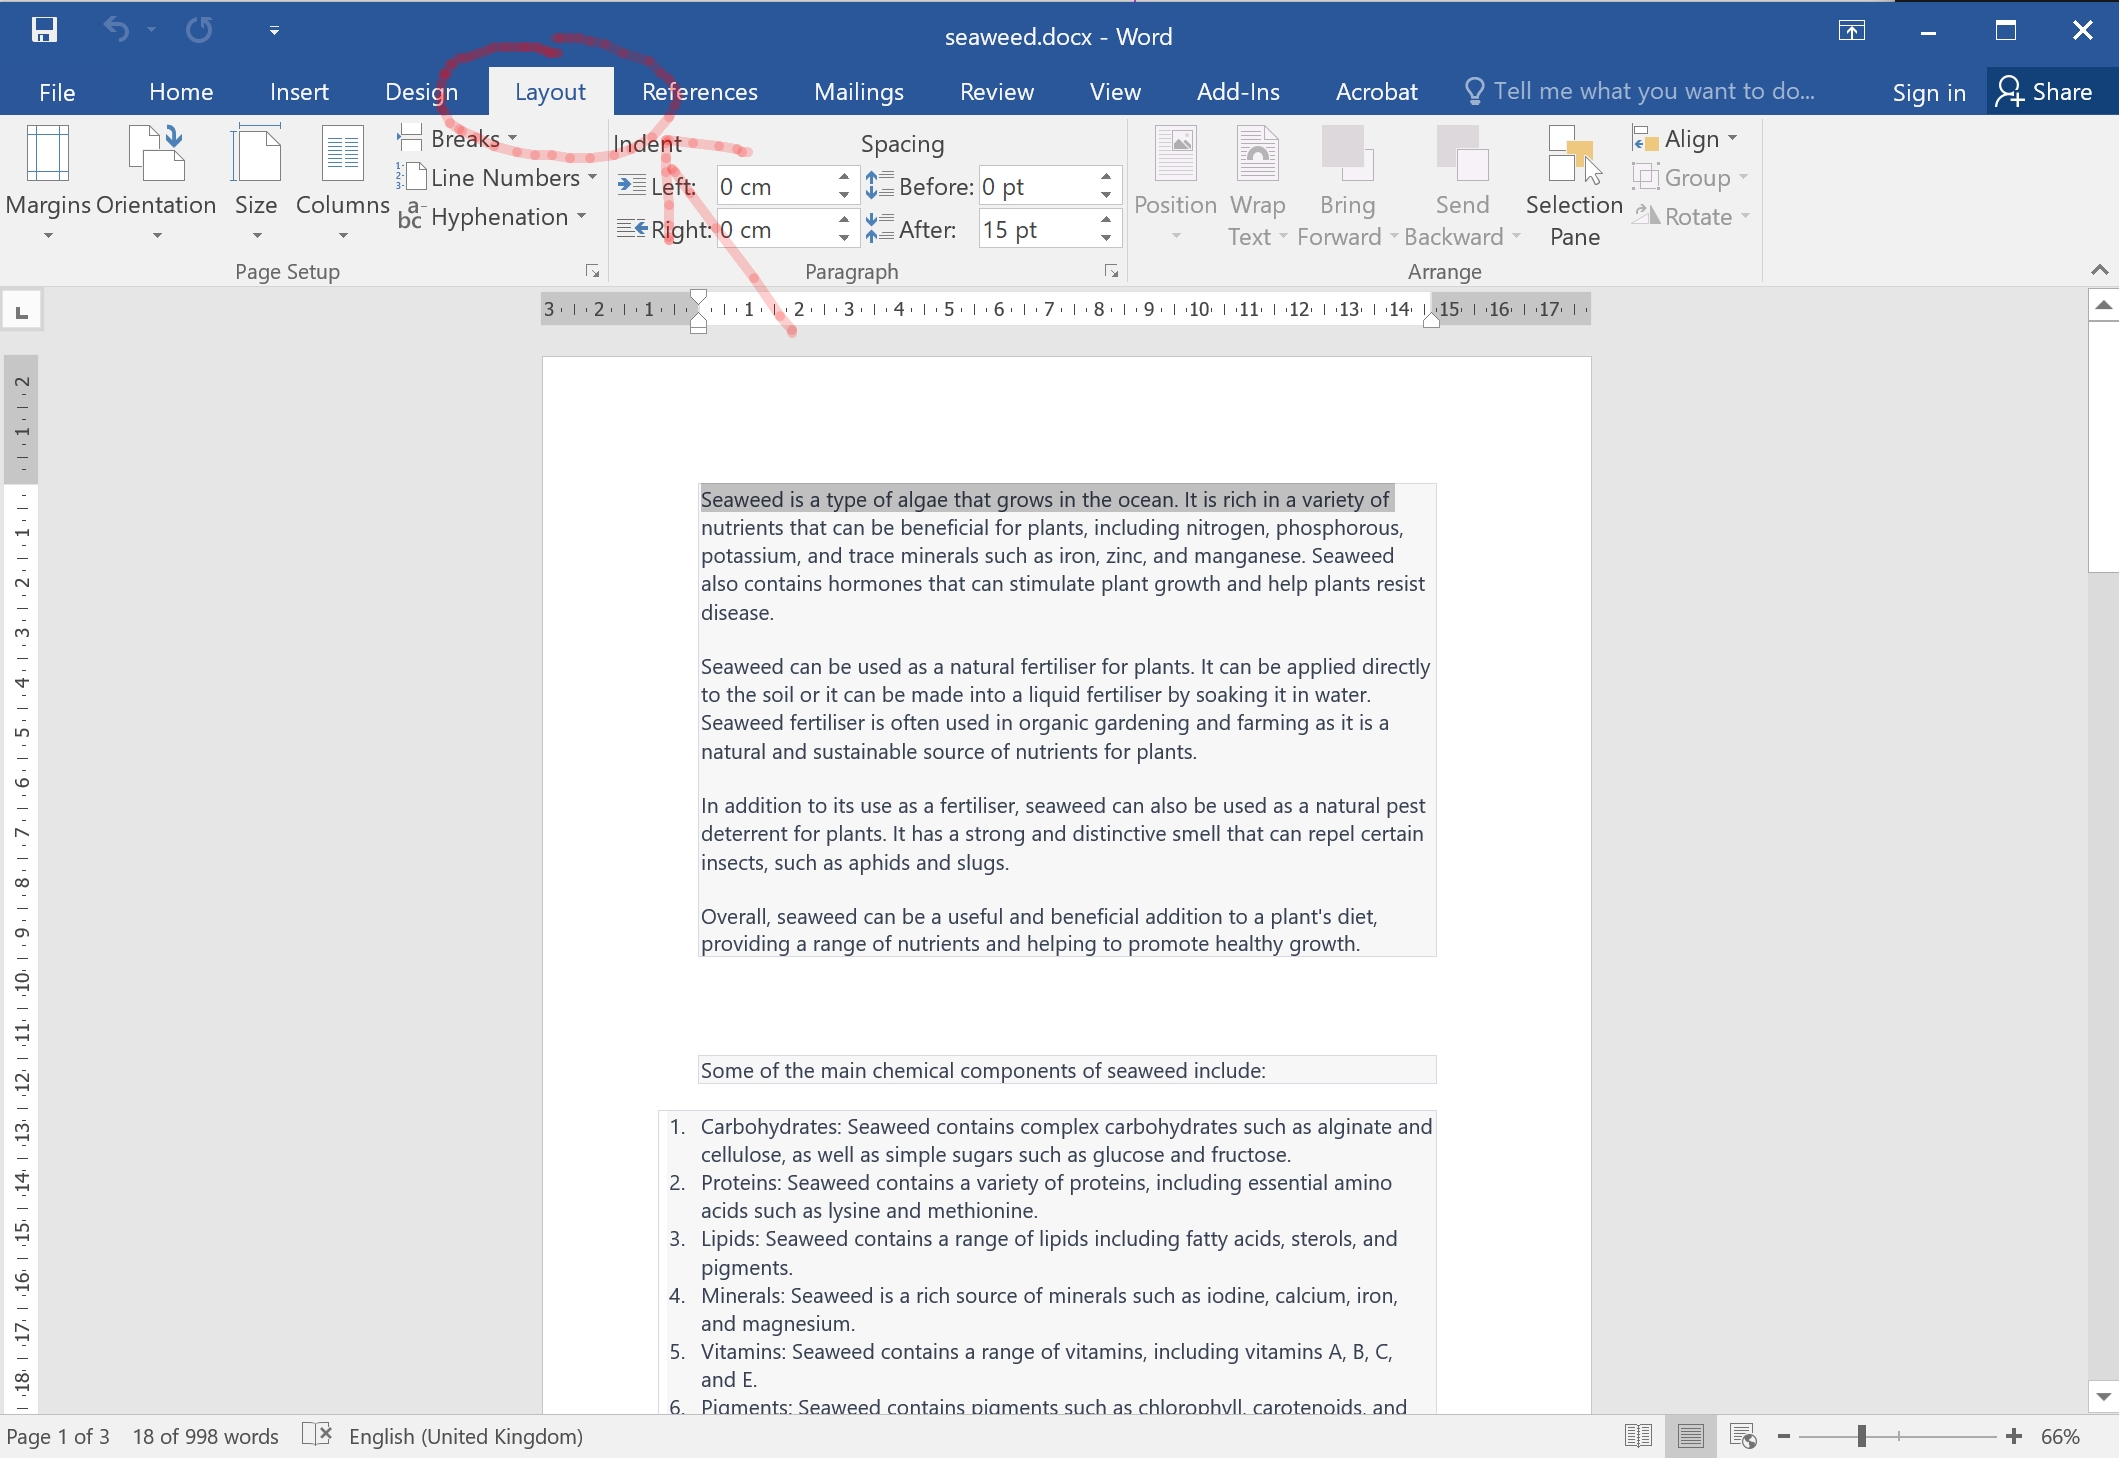
Figure 1. Layout Tab - Select the Margins drop-down box on the left and select Last Custom Setting, Normal, Narrow, Moderate, Wide or Mirrored (for Booklets) or Current Position (see Figure 2).
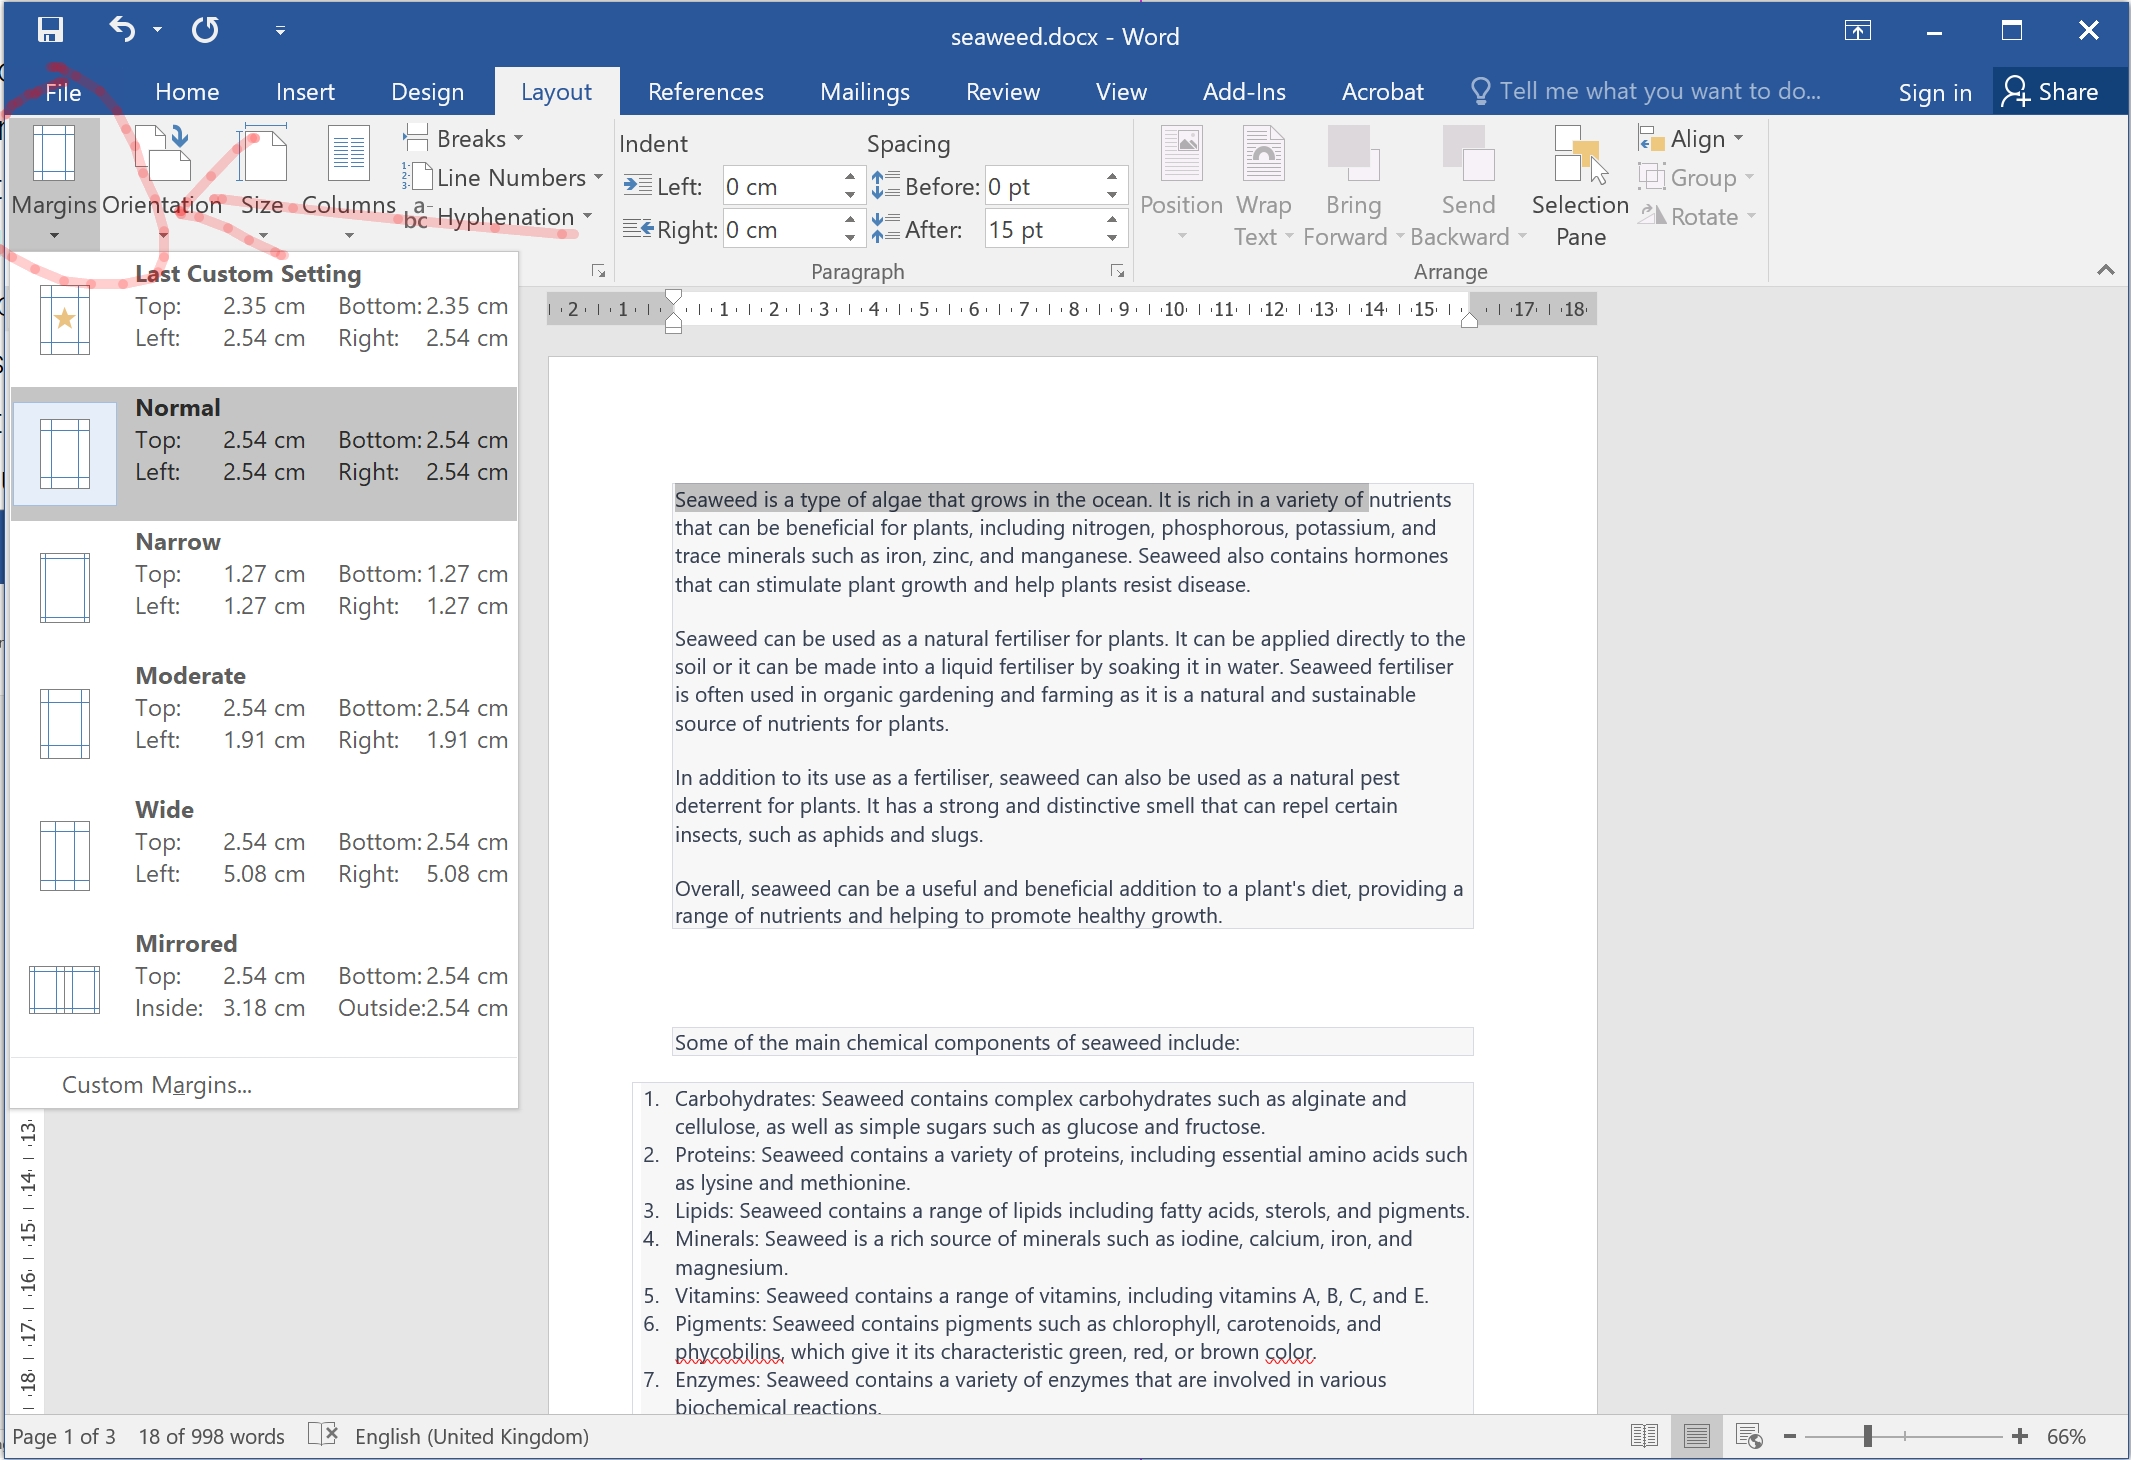 Figure 2. Margins Drop-Down Selection
 - Click the printer icon in the top left corner to print or click File > Print.
How to Change the Margins when Printing
- 8. First repeat steps 1-4 above, and click the File > Print menu option (see Figure 3)
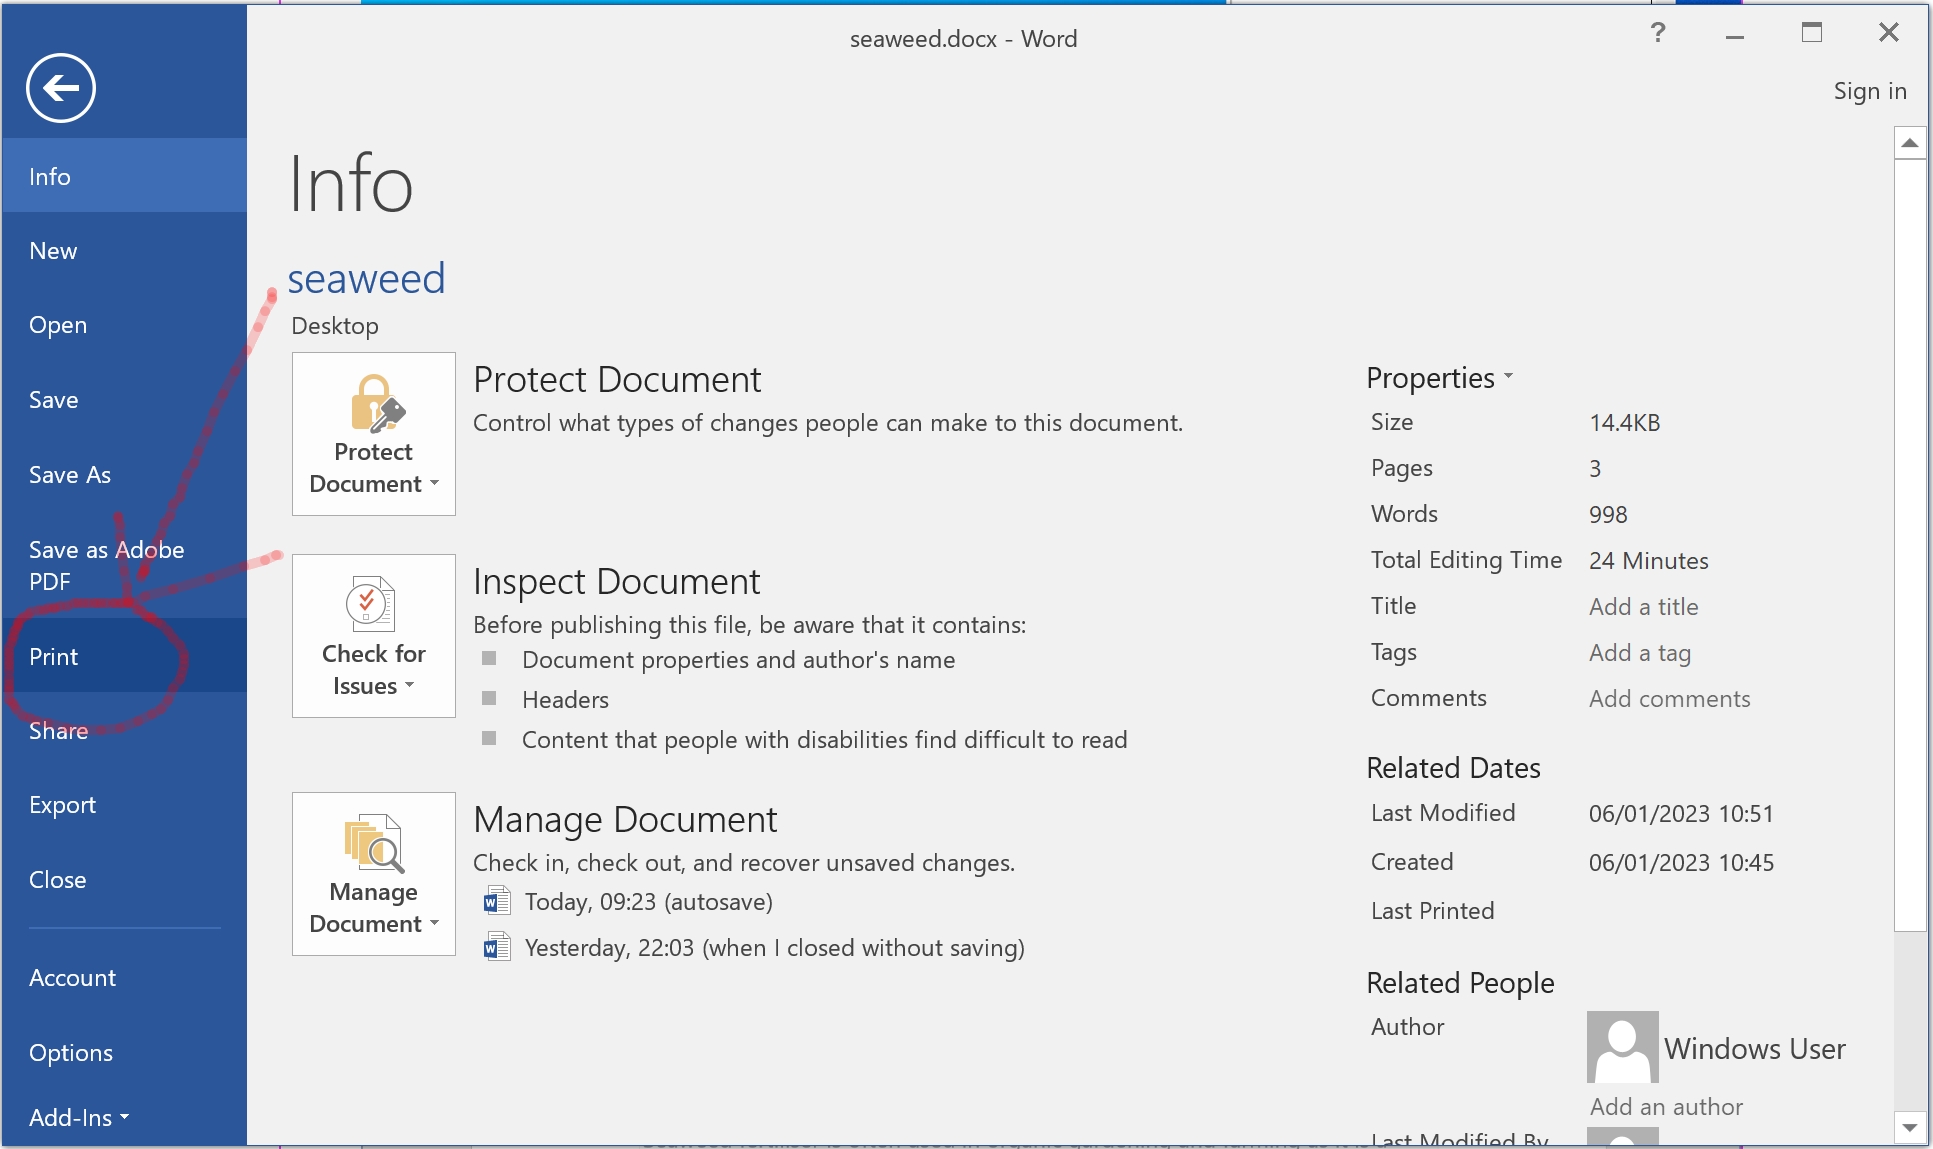
Figure 3. Print
- 9. Click the current margins setting in the print settings to change it to another setting e.g. Narrow, (see Figure 4)
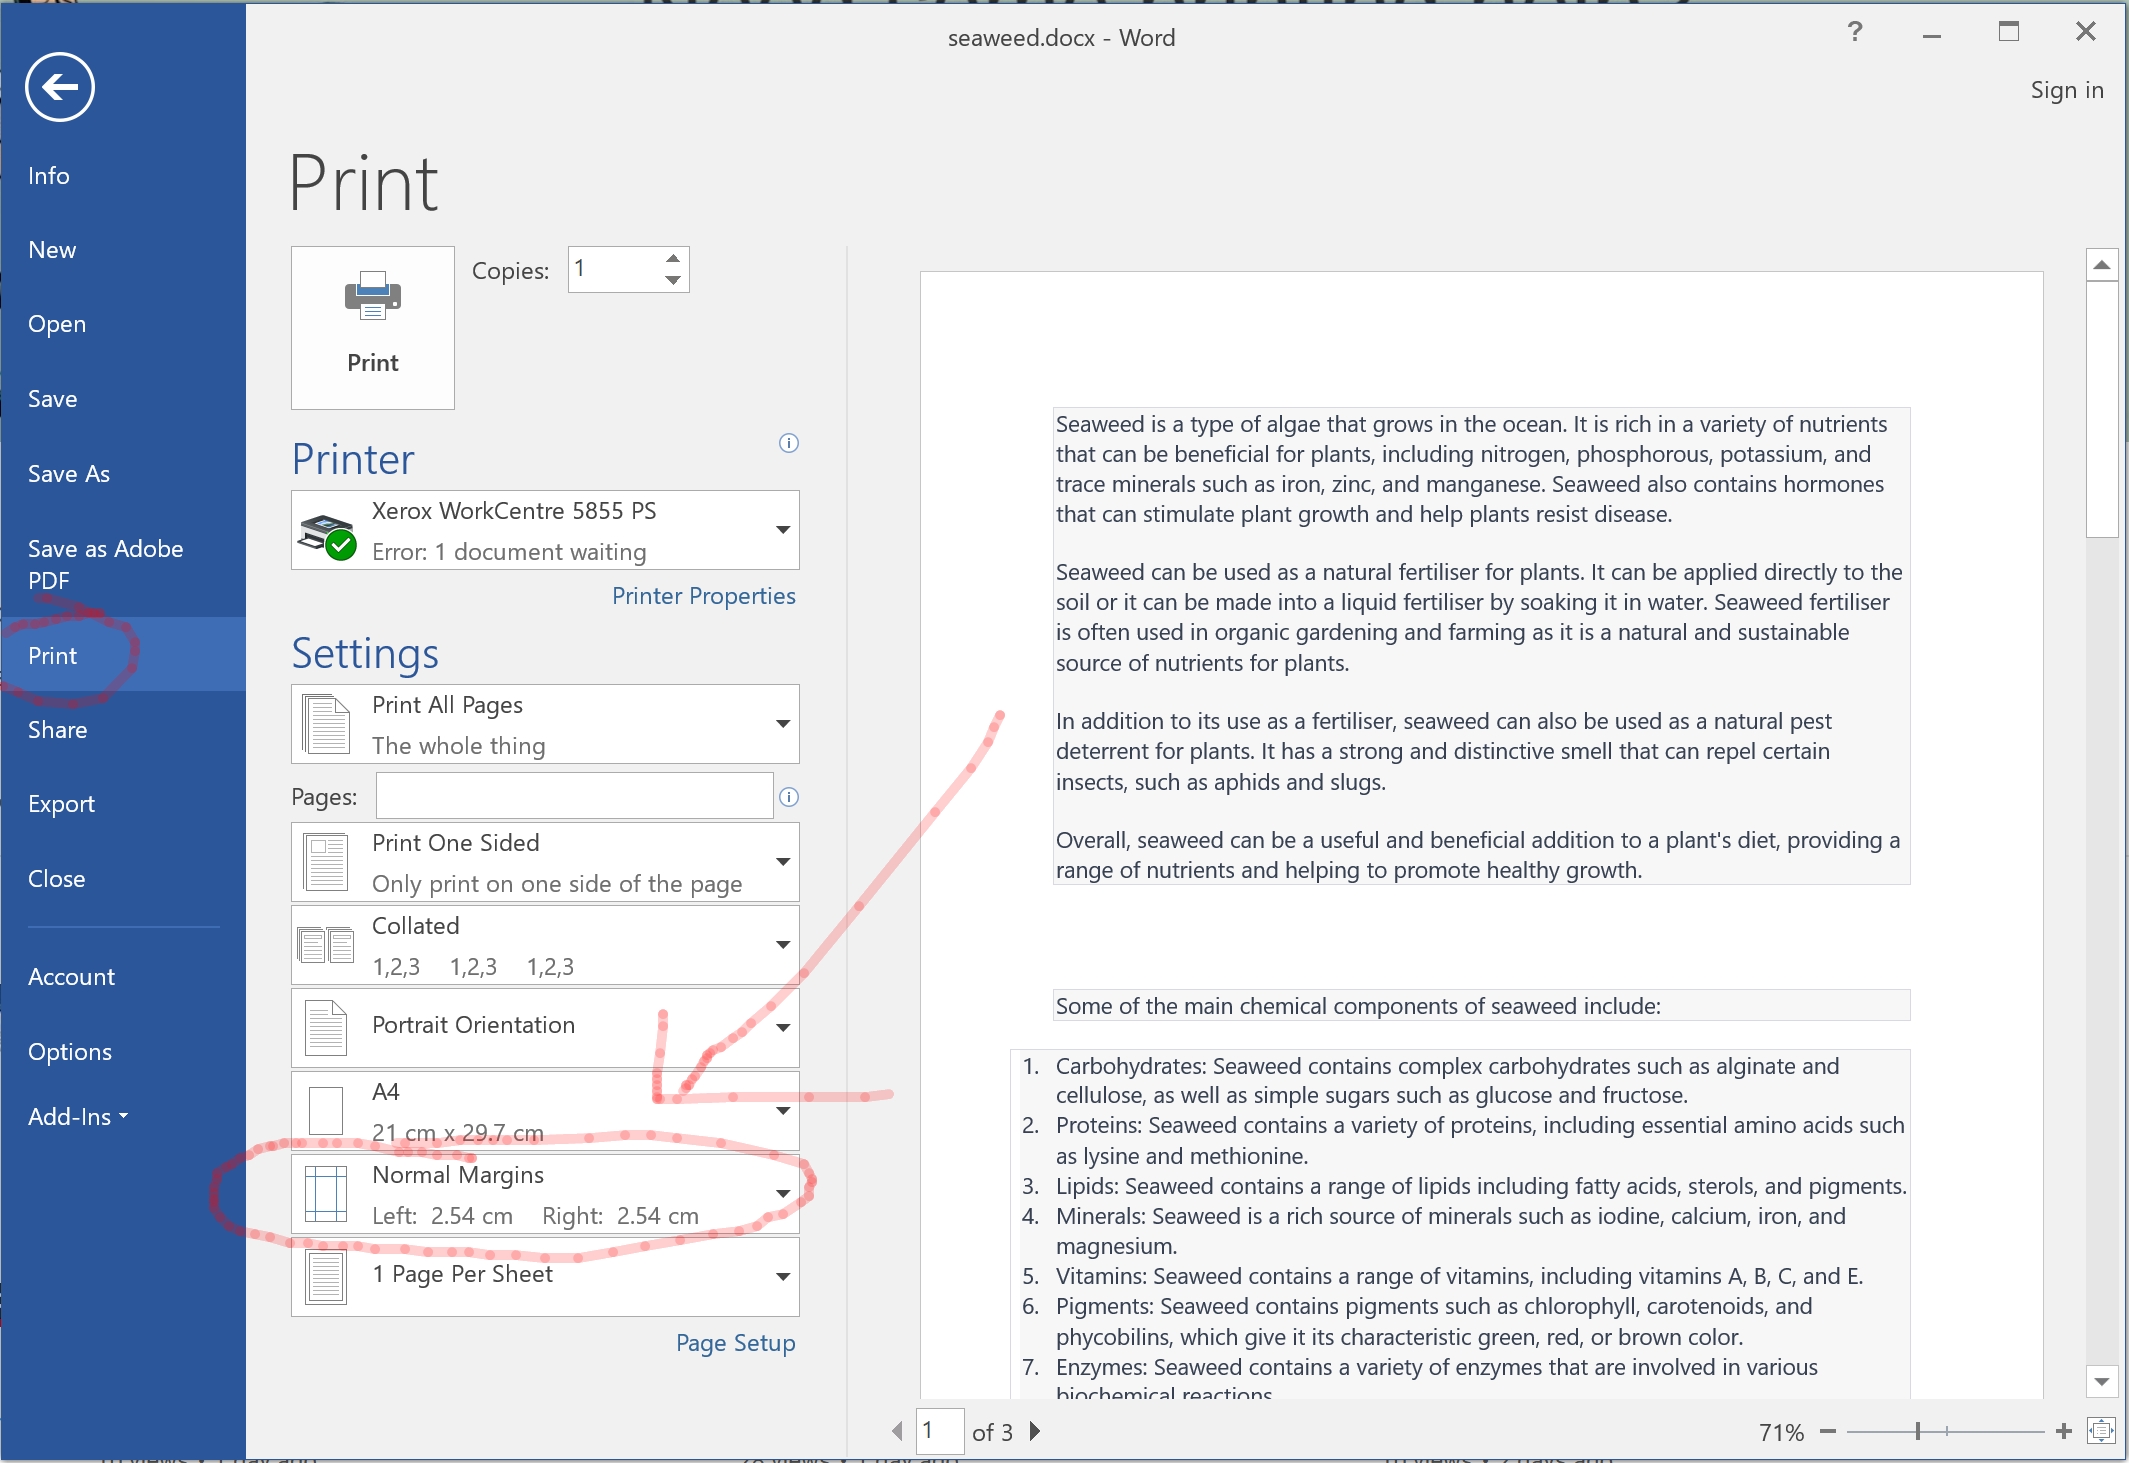
Figure 4. Print Settings - 10. For example (see Figure 5)
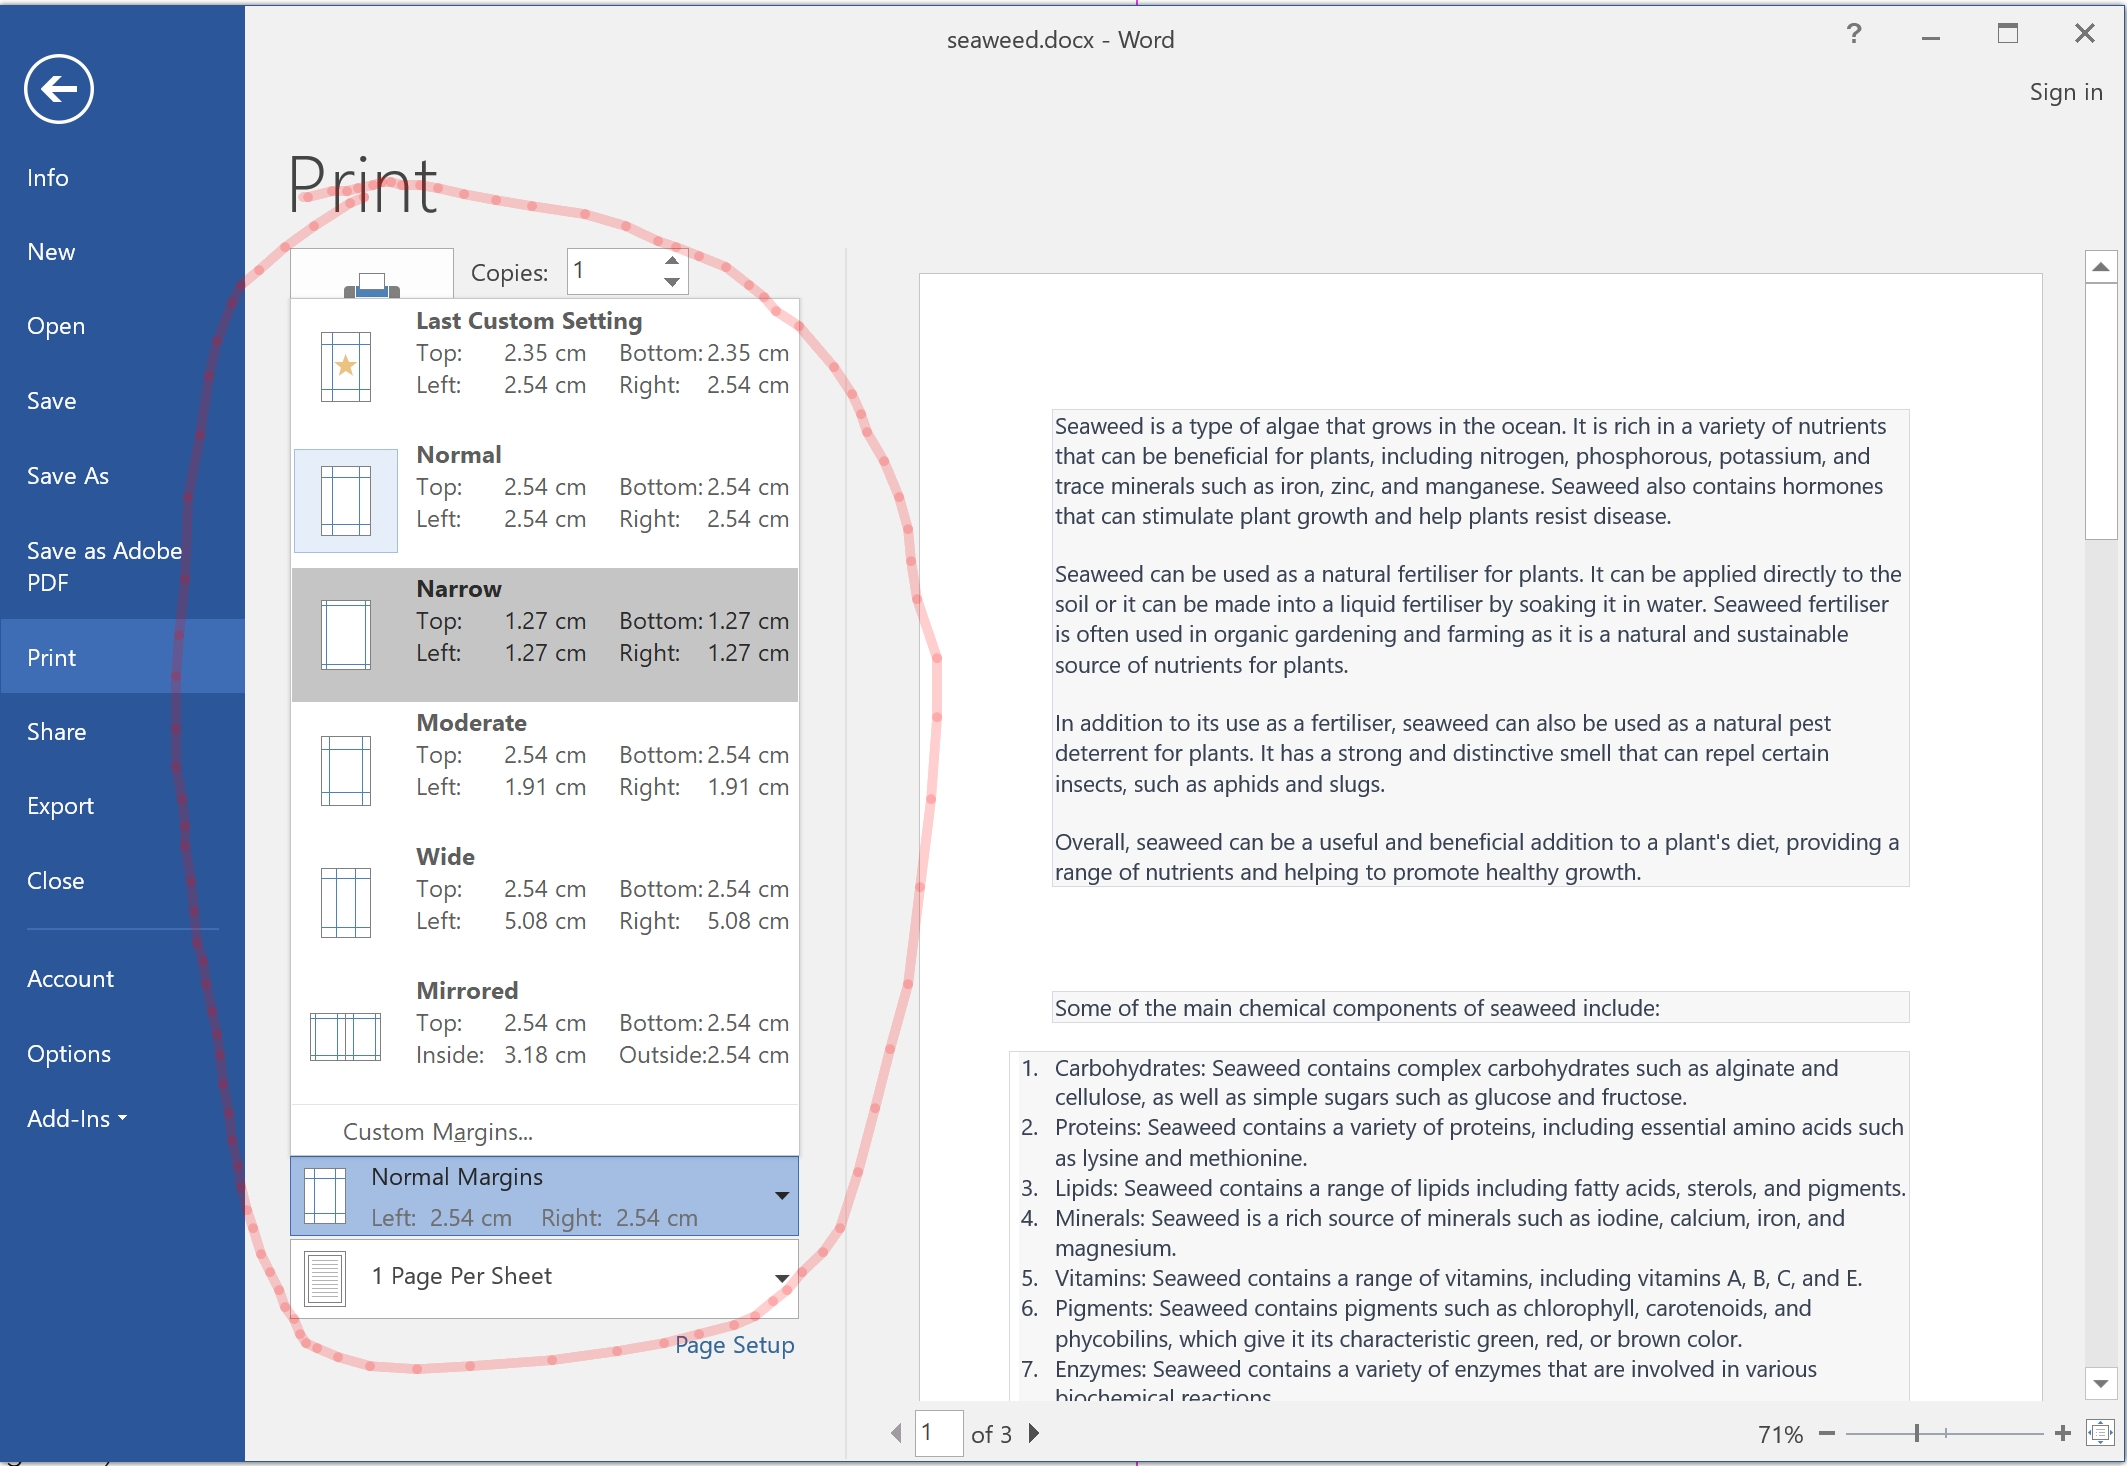
Figure 5. Print - 11. Choose your printer and click the Print button.
How to Customize the Margins for All of the document or Parts of the document
- 12. First repeat steps 1-4 above then click View Tab then click Ruler checkbox (see Figure 6)
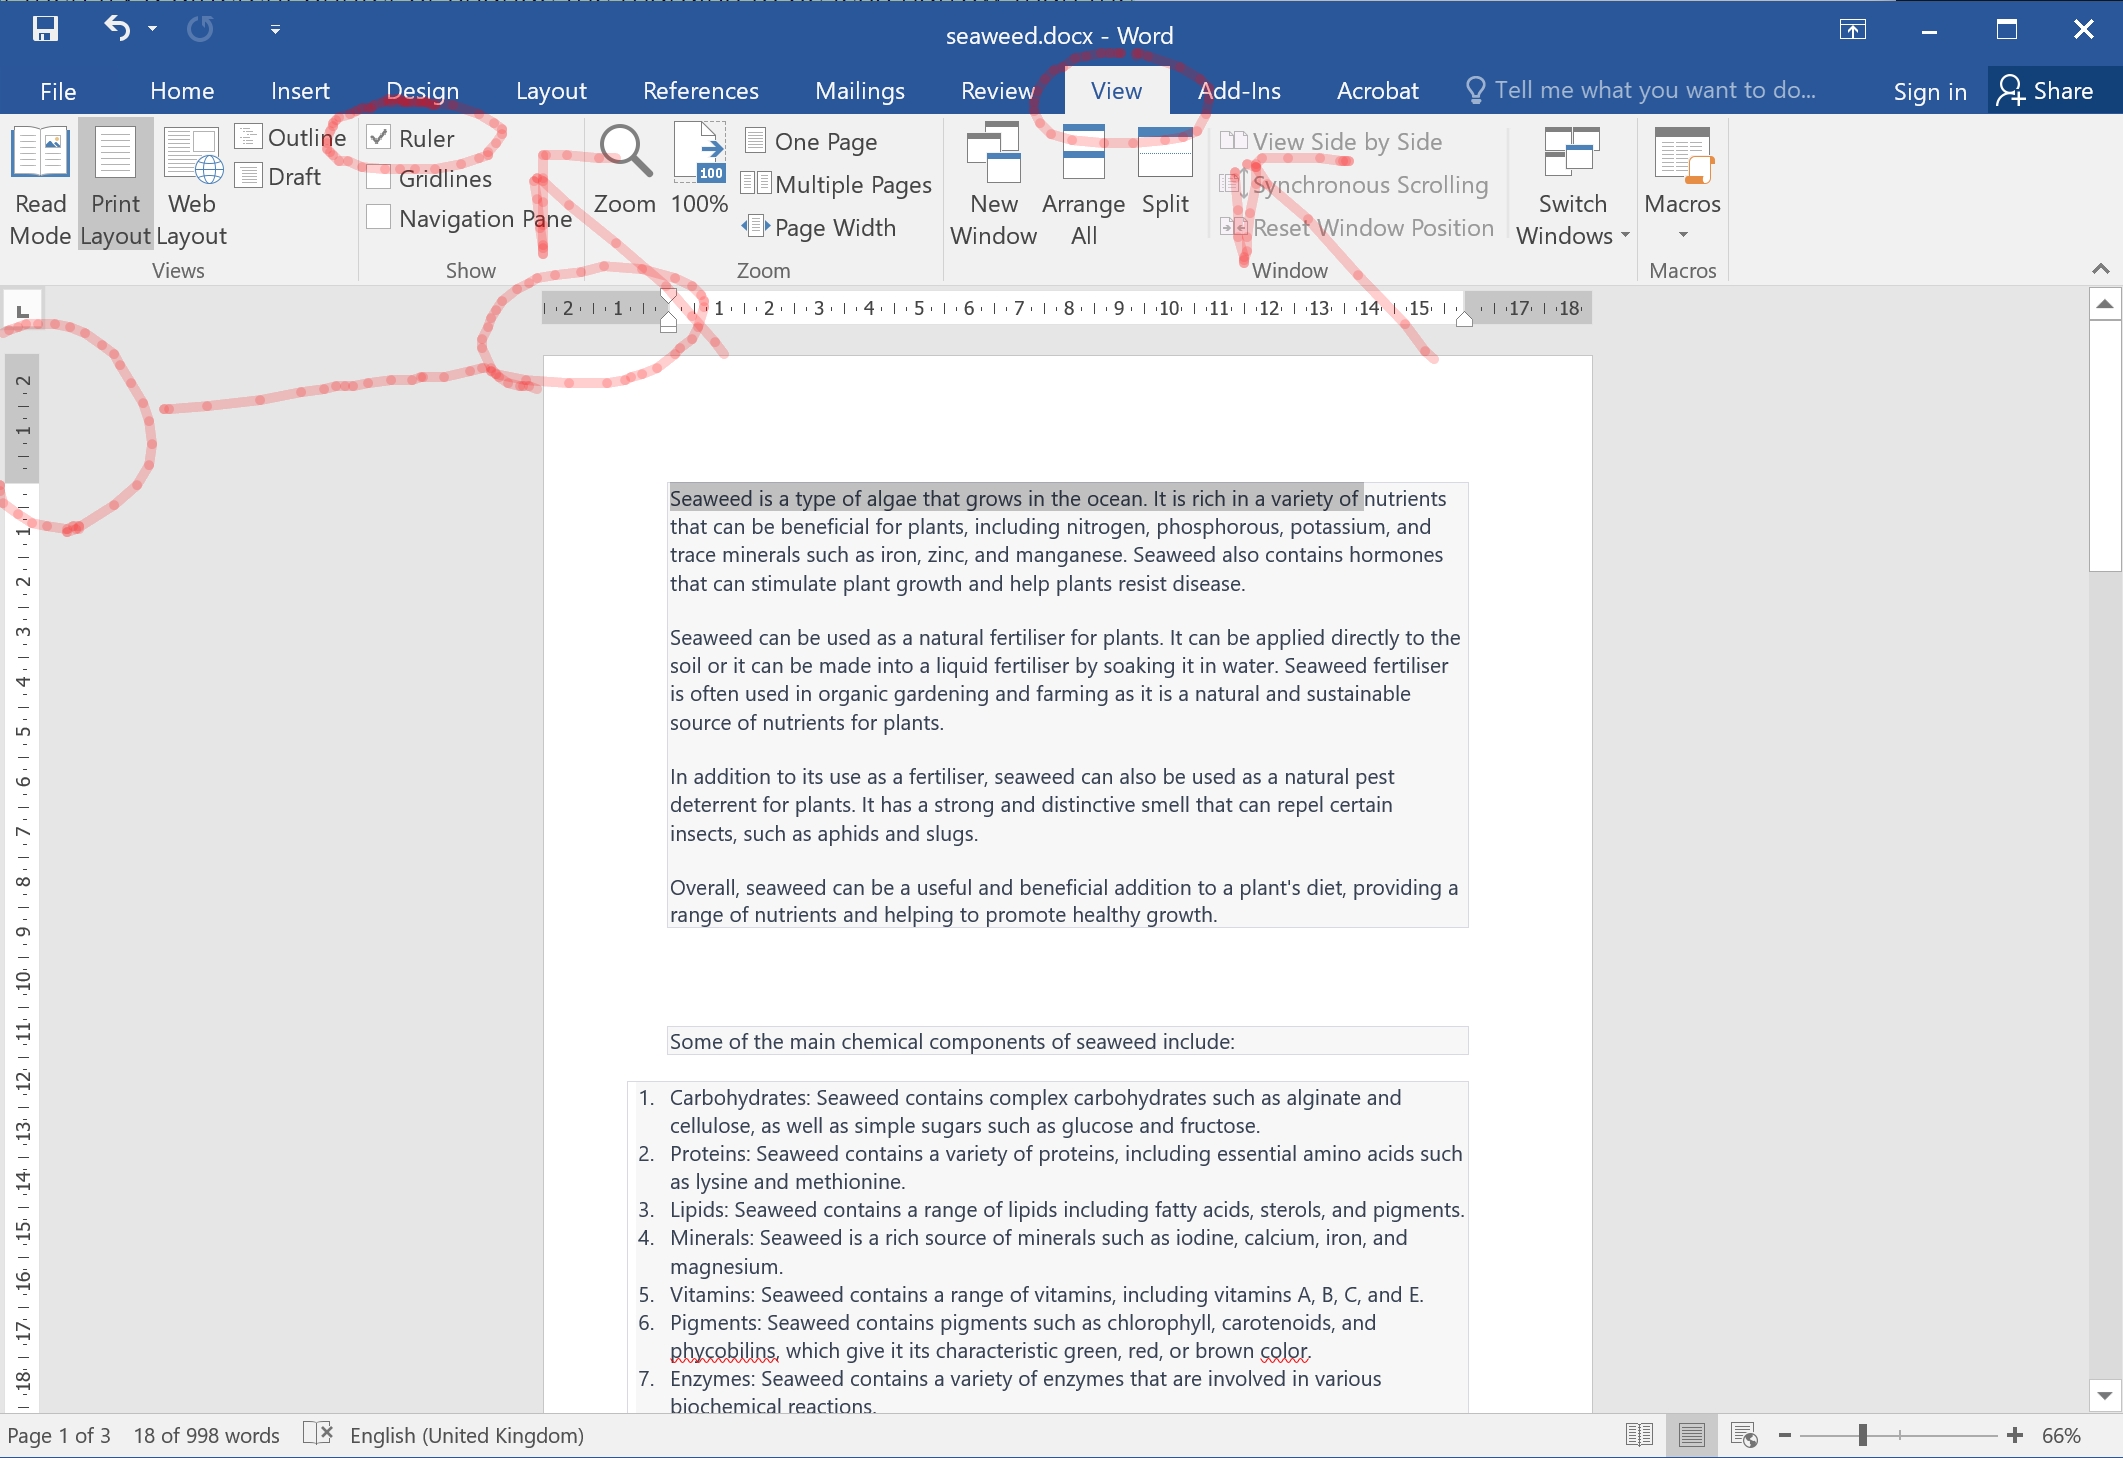
Figure 6. Enable Ruler - 13. Now the ruler is enabled you can click the left mouse on the top ruler and hold the left mouse down for the left and right width settings for your document, this will only change the active text which is by default the first paragraph. To apply the custom margins to All of the document press CTRL+A key together to select all the text then move the ruler to adjust all the text, to move just part of the text select that part only with the mouse and then move the ruler (see Figure 7)
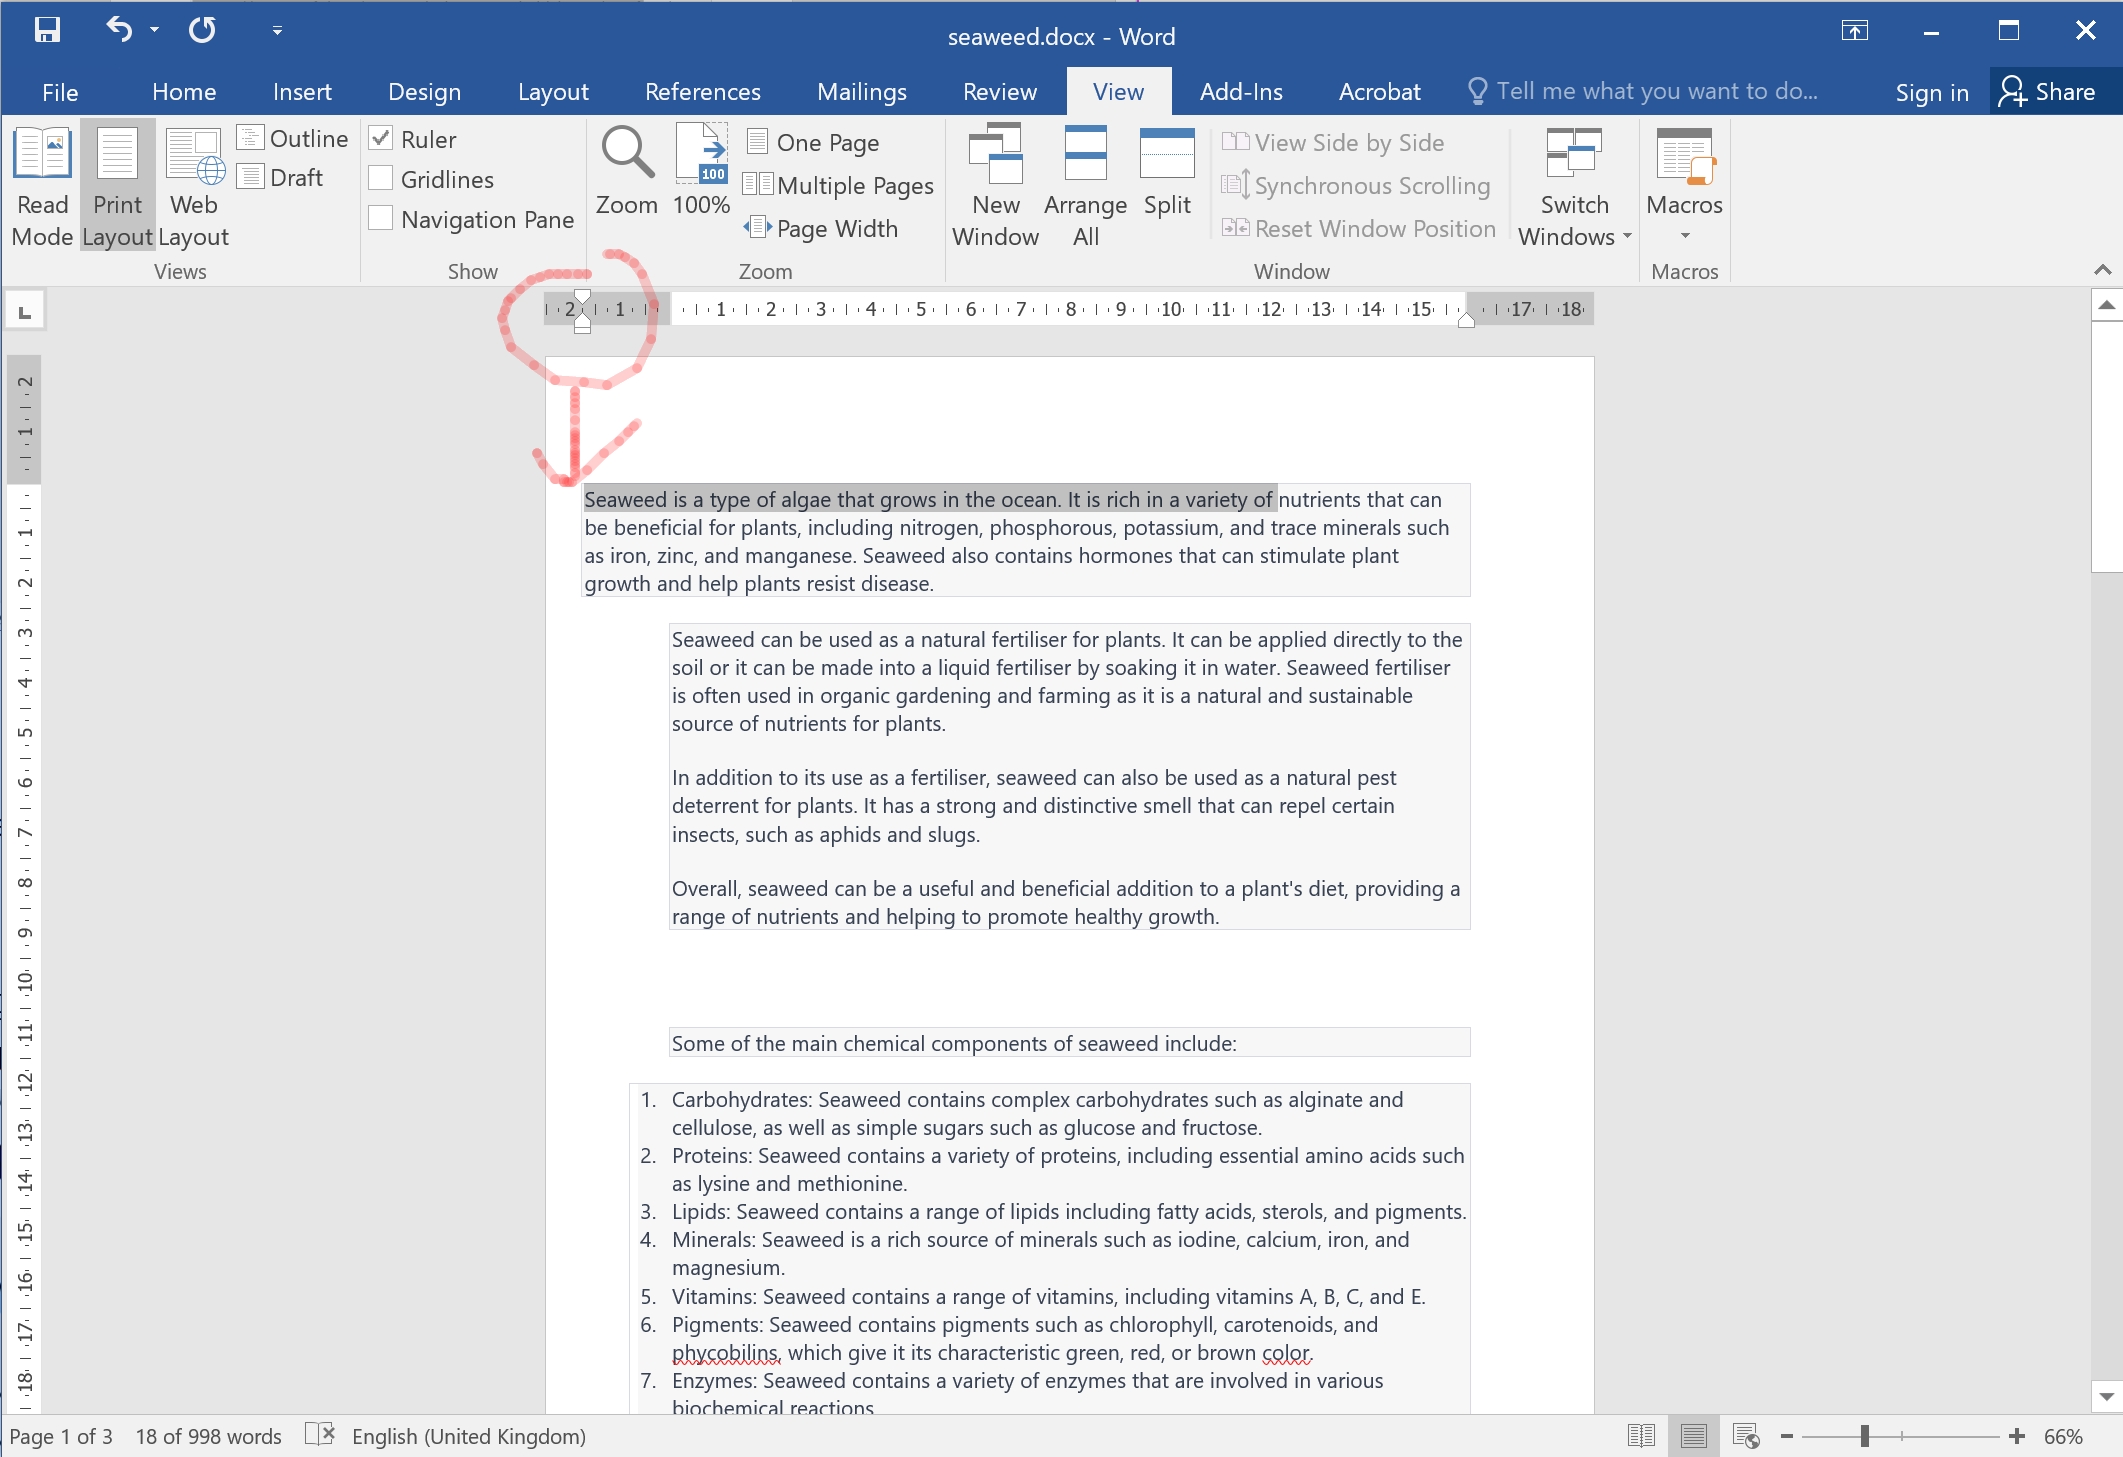
Figure 7. Change Margins with the Ruler - 14. To change the top and Bottom Margins with the Ruler click the left mouse anywhere on the page text then the up and down ruler will show and be enabled. Move the rulers up and down how you want them. (see Figure 8)
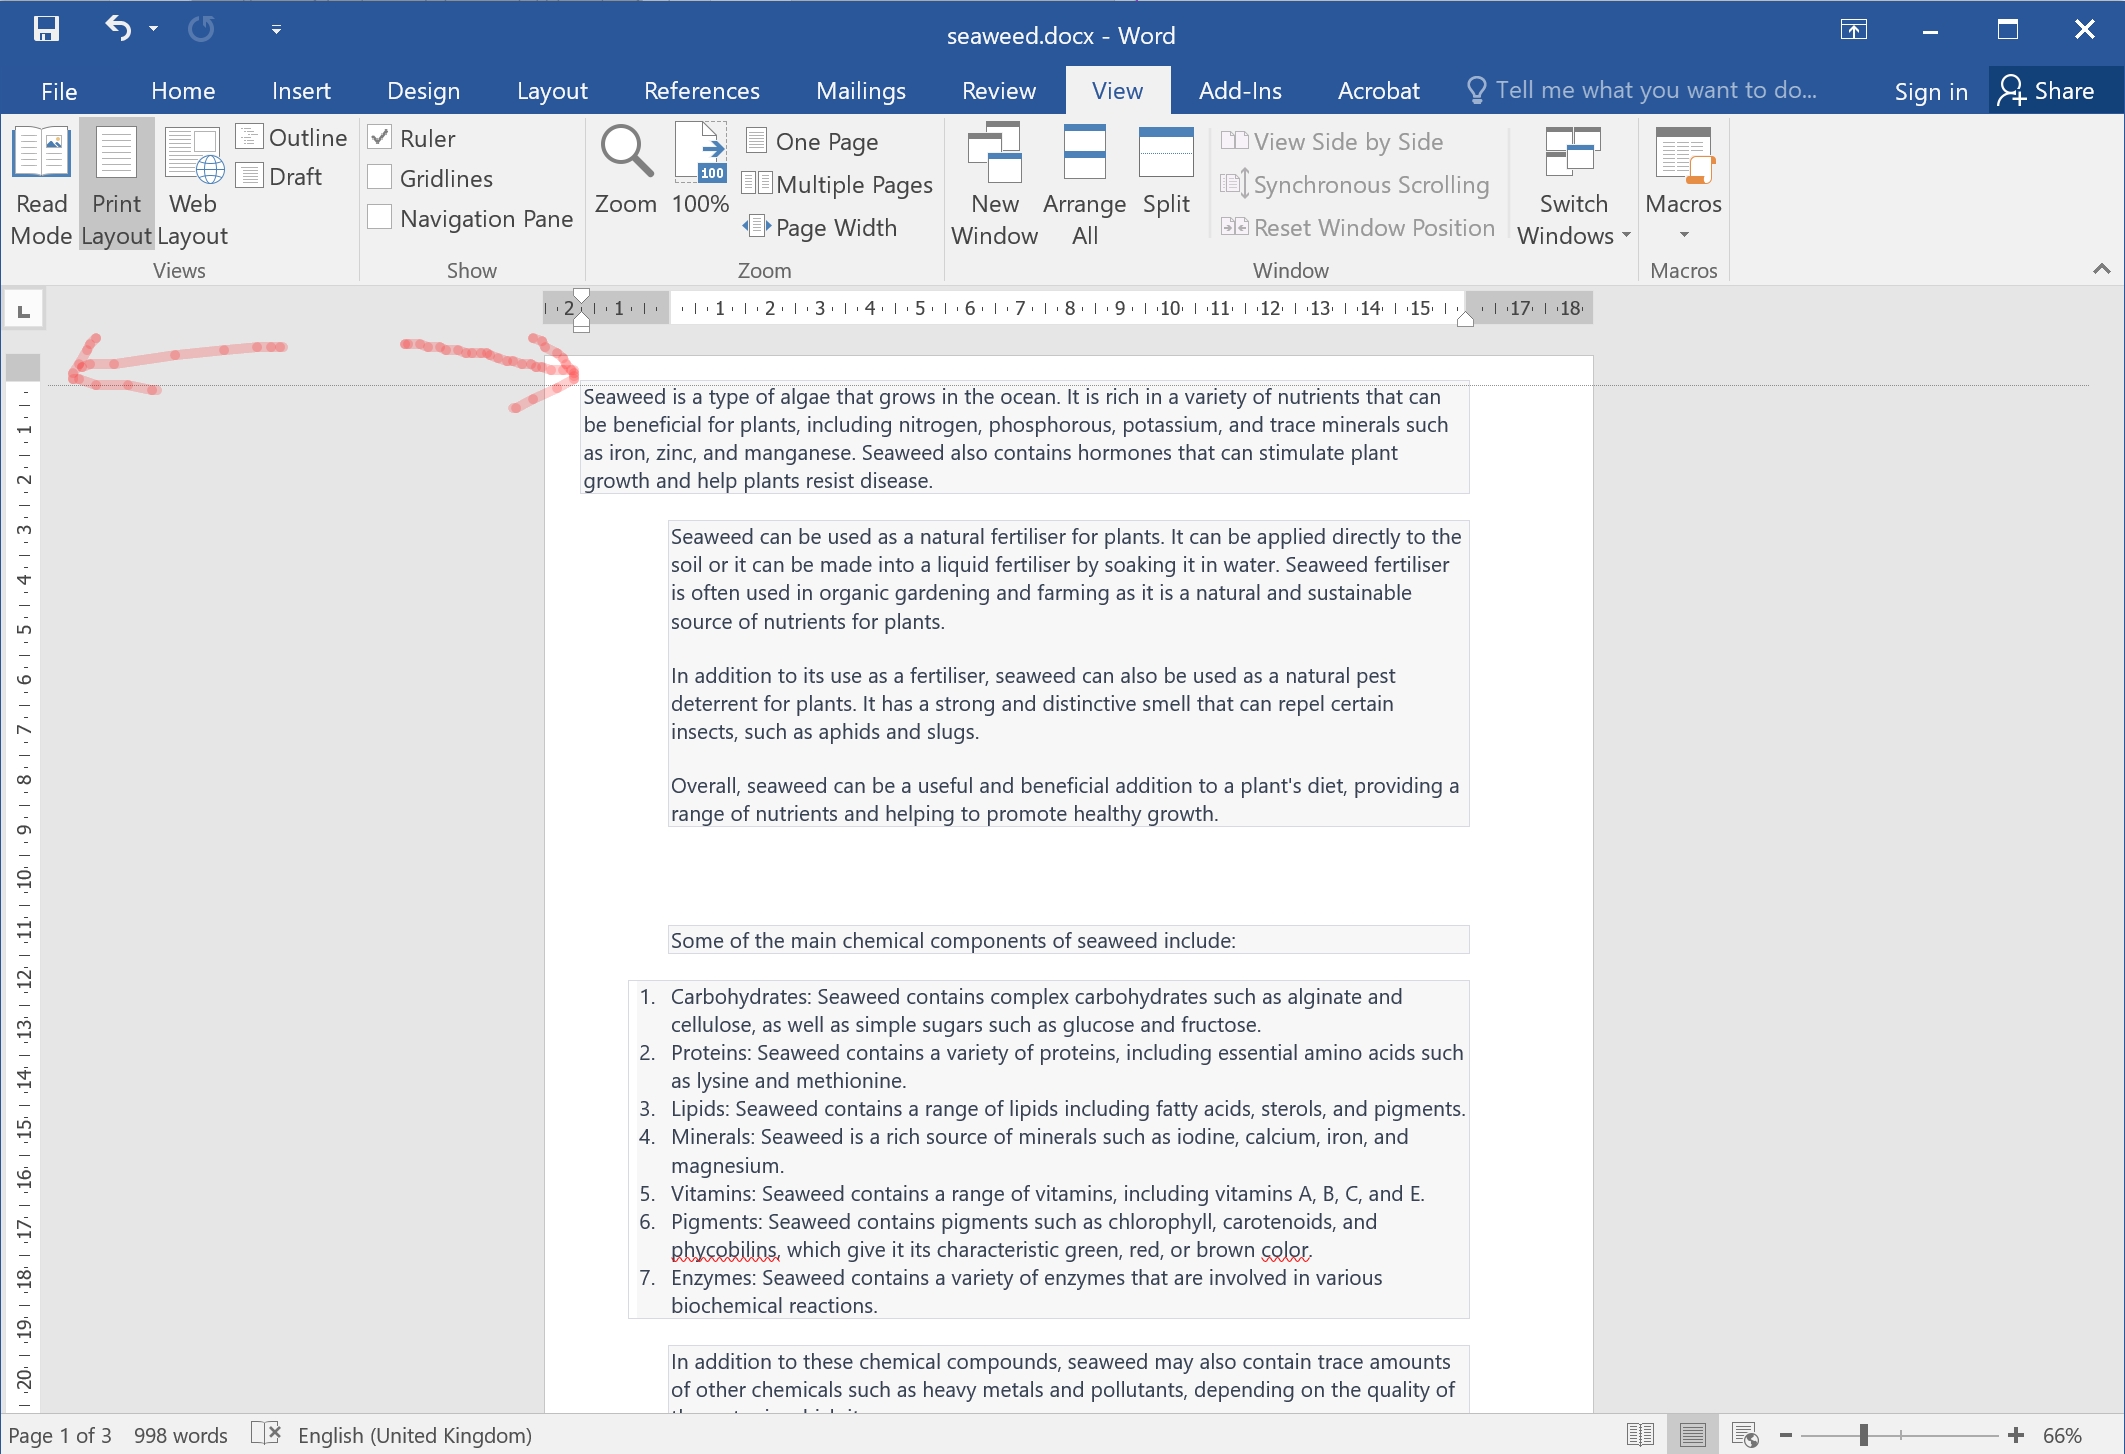
Figure 8. Change the Vertical Margins with the Ruler - 15. To Print click File > Print to print the document.
- 16. To Save Click File > Save or Save As… to save to a new Word file document.